
Concrete spalling can make a driveway, patio, or sidewalk look worn out and unsafe. I have seen how small patches of flaking concrete can quickly spread into larger areas of damage when left alone.
The good news is that many cases can be repaired without replacing the entire slab.
In this guide, I will show you how to repair concrete spalling step by step using common tools and materials.
You will learn what causes spalling, how to prepare the damaged area, which repair products work best, and how to prevent the problem from coming back.
If you want to restore the appearance and strength of your concrete, this guide will explain the process clearly so you can achieve lasting results.
What Is Concrete Spalling?
Concrete spalling refers to the flaking, chipping, or breaking away of the concrete’s surface layer.
It typically appears as shallow craters, pits, or large patches where the top layer has peeled off, exposing the rough aggregate beneath.
Spalling can affect any concrete surface, from driveways and sidewalks to basement walls and parking structures.
It is not just an eyesore.
Spalled concrete can become a tripping hazard, allow moisture to penetrate deeper into the slab, and ultimately compromise the integrity of the structure.
Recognizing it early gives you the best chance of making a simple, cost-effective repair.
What Causes Concrete Spalling?
Concrete spalling can occur for several reasons, and understanding these causes can help prevent future damage.
- Freeze-thaw cycles: Water in concrete expands when frozen, creating pressure that breaks down the surface over time.
- Deicing salts: Road salt and other chemical deicers can accelerate freeze-thaw damage and gradually weaken the concrete surface, leading to cracking.
- Poor concrete mix or placement: Too much water or poor finishing can weaken the surface, increasing the likelihood of spalling.
- Corrosion of reinforcing steel: Rusting steel reinforcement expands inside the concrete, creating pressure that can crack and break away large sections.
- Carbonation: Carbon dioxide can weaken concrete over time, reducing corrosion resistance and increasing the risk of spalling.
Tools and Materials Needed to Repair Concrete Spalling
Before you get started, gathering everything you need upfront will make the job go much smoother.
- Cold Chisel
- Wire Brush
- Concrete Bonding Adhesive
- Polymer-Modified Repair Mortar
- Trowel and Float
- Pressure Washer
- Concrete Sealer
How to Repair Concrete Spalling?
With your tools and materials ready, it is time to get to work. Follow these steps carefully, and your repair will be solid, long-lasting, and nearly invisible.
Step 1: Pressure Wash the Damaged Concrete
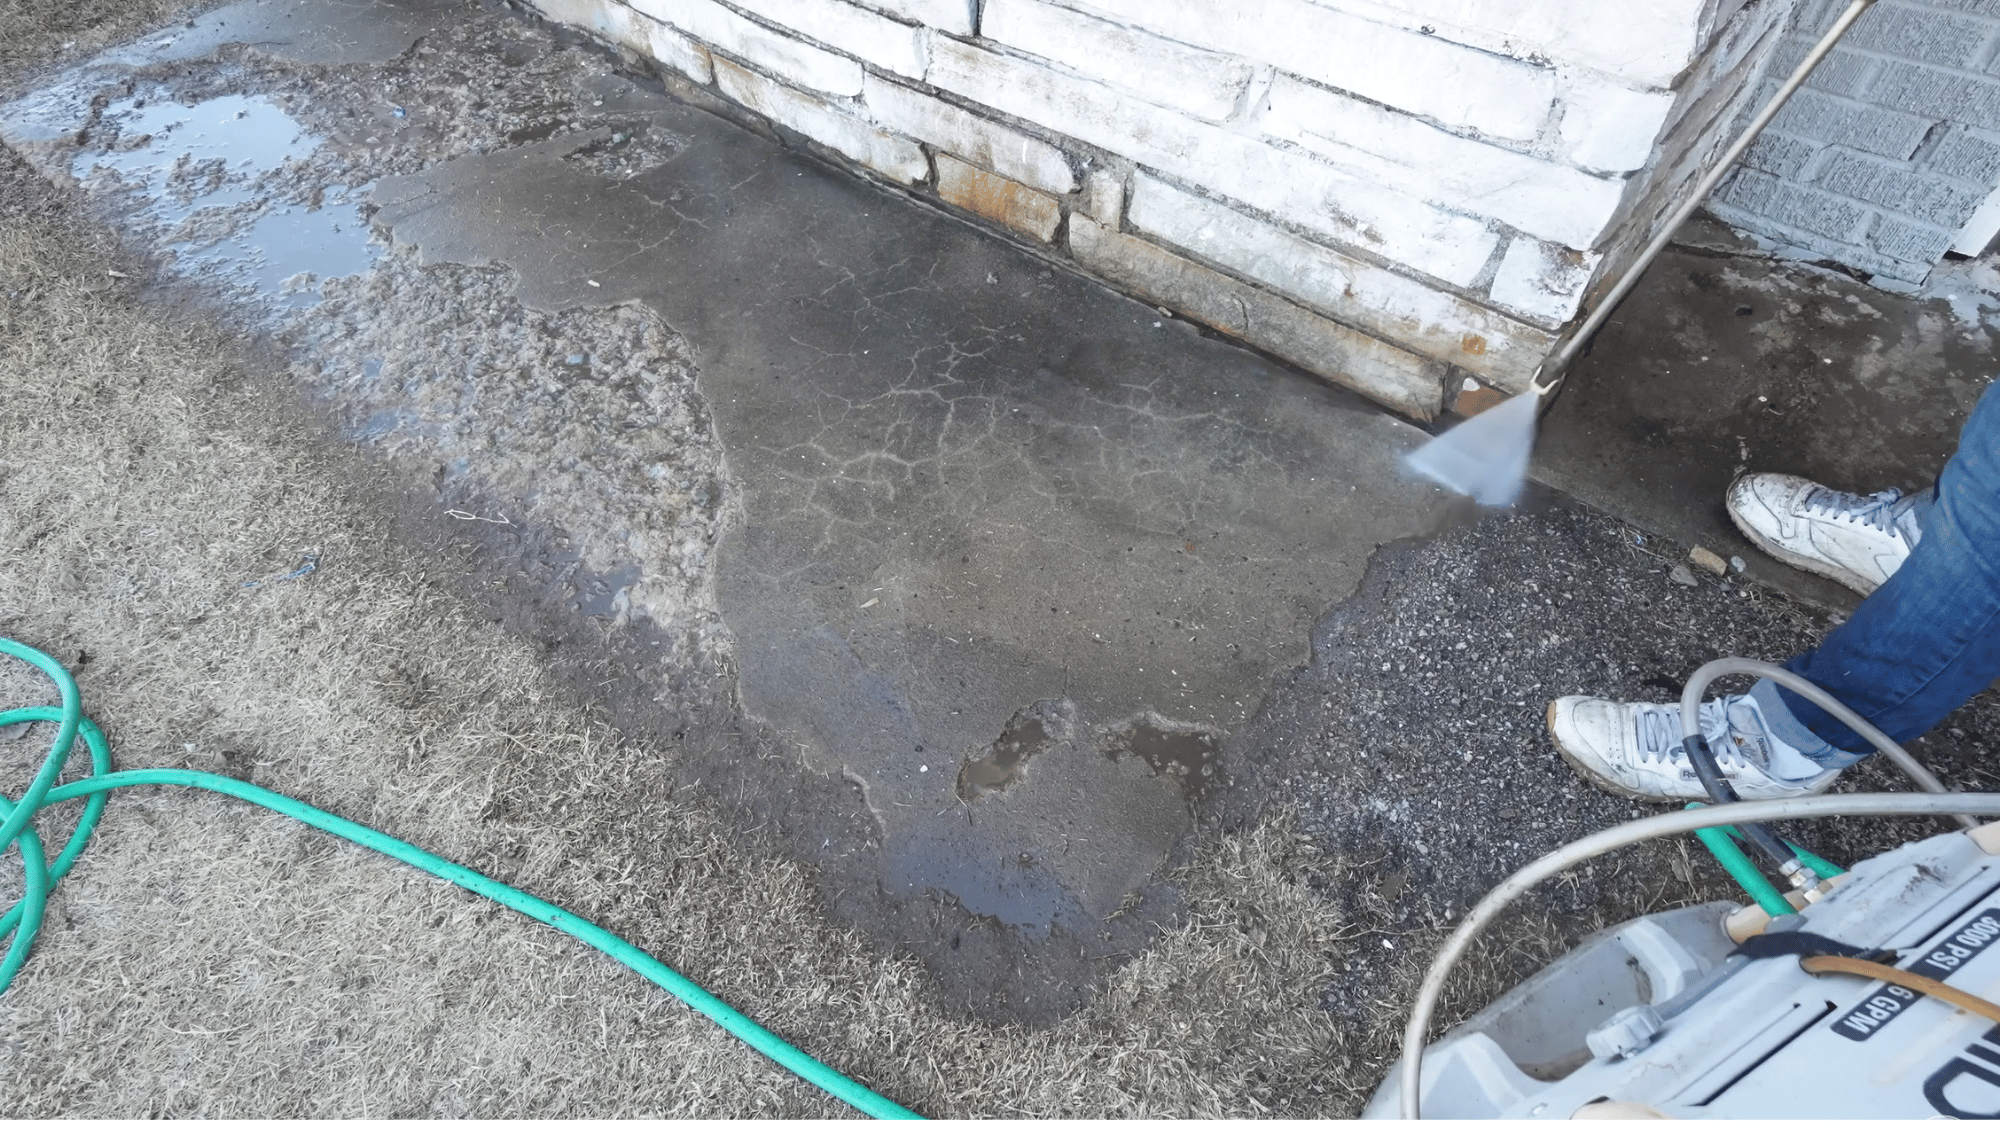
Start by cleaning the concrete surface thoroughly with a pressure washer. This removes loose gravel, dirt, dust, and other debris that could prevent the repair material from bonding properly.
If a pressure washer is not available, a stiff brush and water can also help. The goal is to create a clean surface before beginning any repair work.
Taking the time to clean thoroughly improves adhesion and contributes to a longer-lasting repair.
Step 2: Prepare the Repair Area
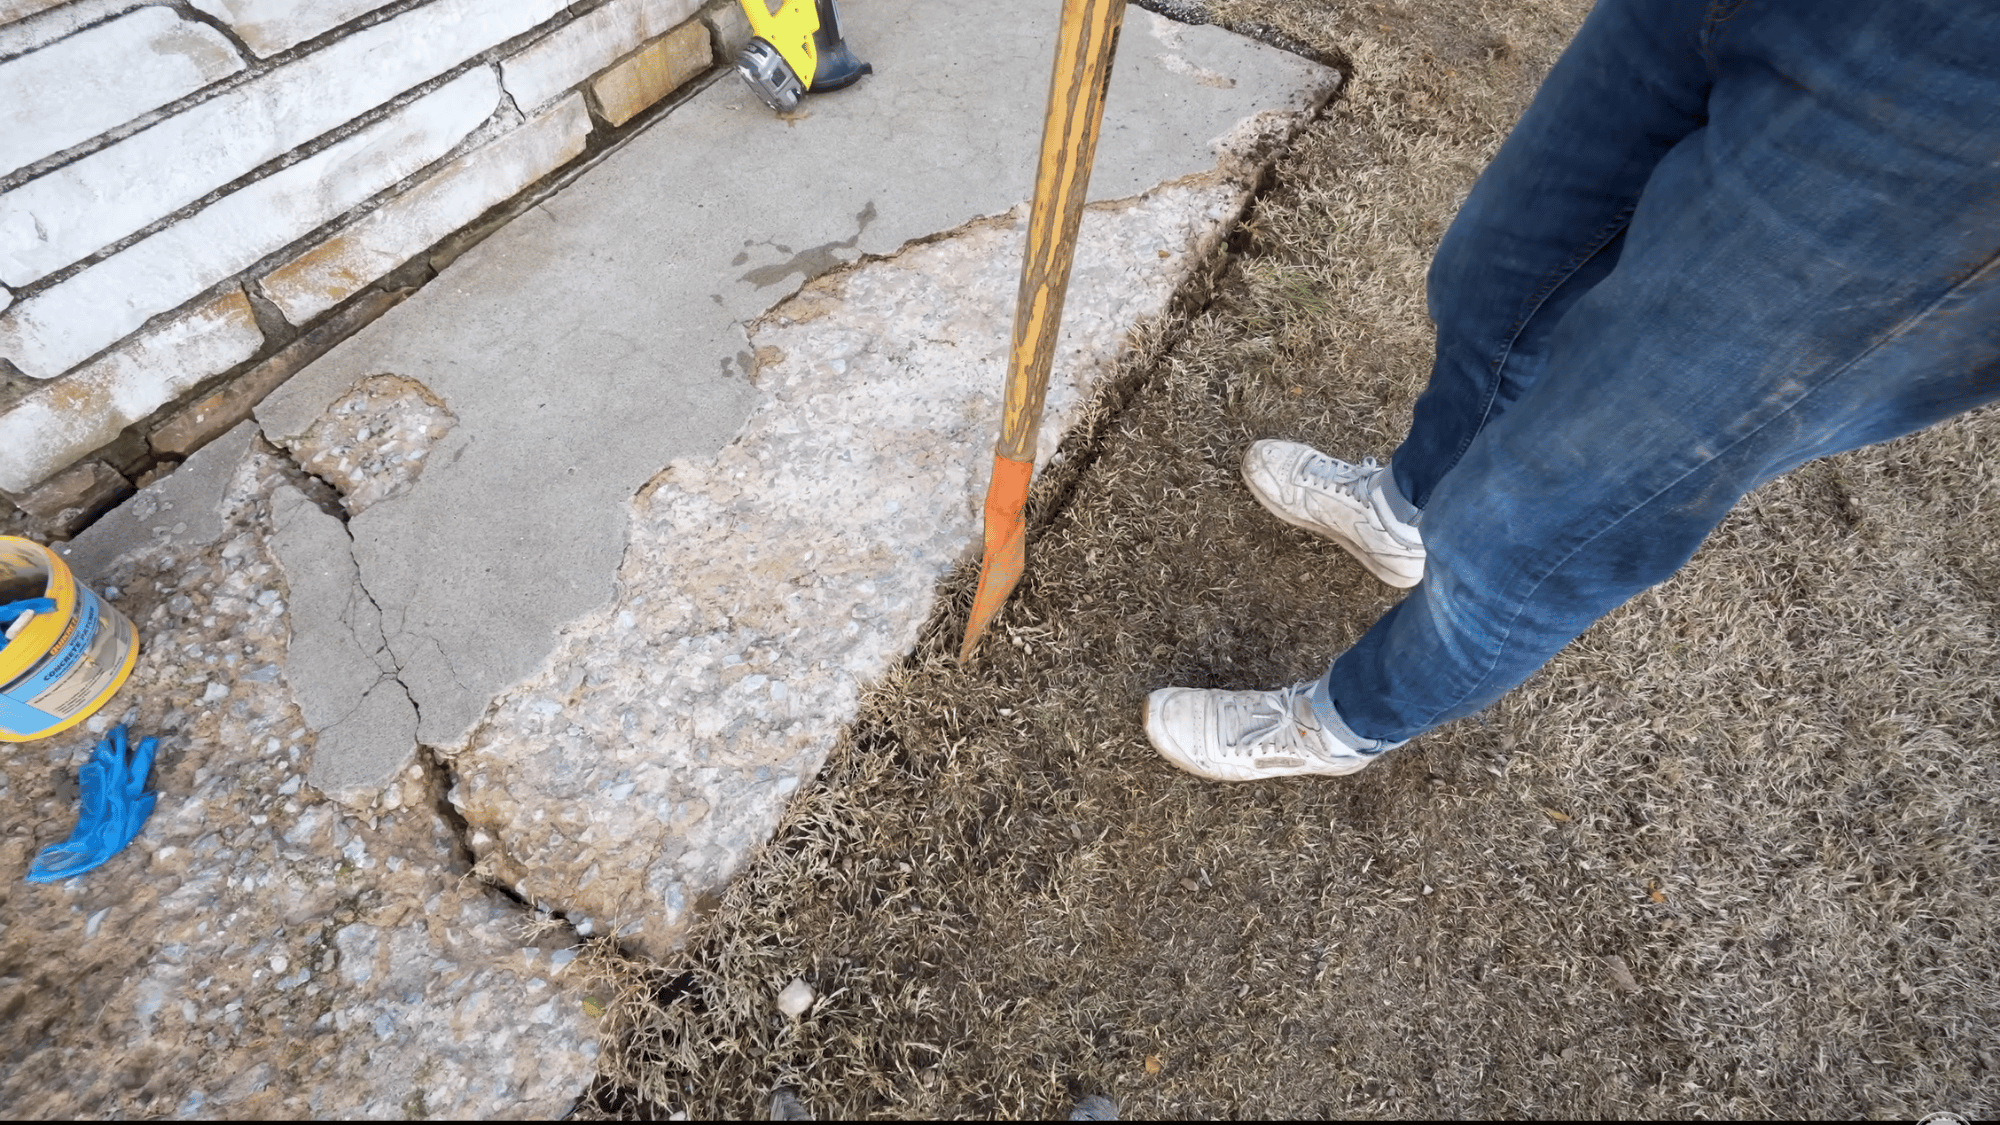
Prepare the damaged area before making repairs. Remove soil or debris from the edges so the repair material can spread evenly across the surface.
This is also a good time to inspect the depth of the damage. Deep spalling or large voids often need patching before resurfacing.
Proper preparation creates a stronger bond between the old and new material and helps produce a smoother finished surface.
Step 3: Mix and Apply the Concrete Patch

Mix the concrete patch with water until it reaches a thick consistency that holds its shape. Using a trowel, firmly press the patch into all damaged sections and low spots.
Focus on rebuilding missing areas rather than creating a perfect finish at this stage.
Make sure the patch is packed tightly against the existing concrete to create a strong bond and provide a solid base for resurfacing.
Step 4: Level the Surface
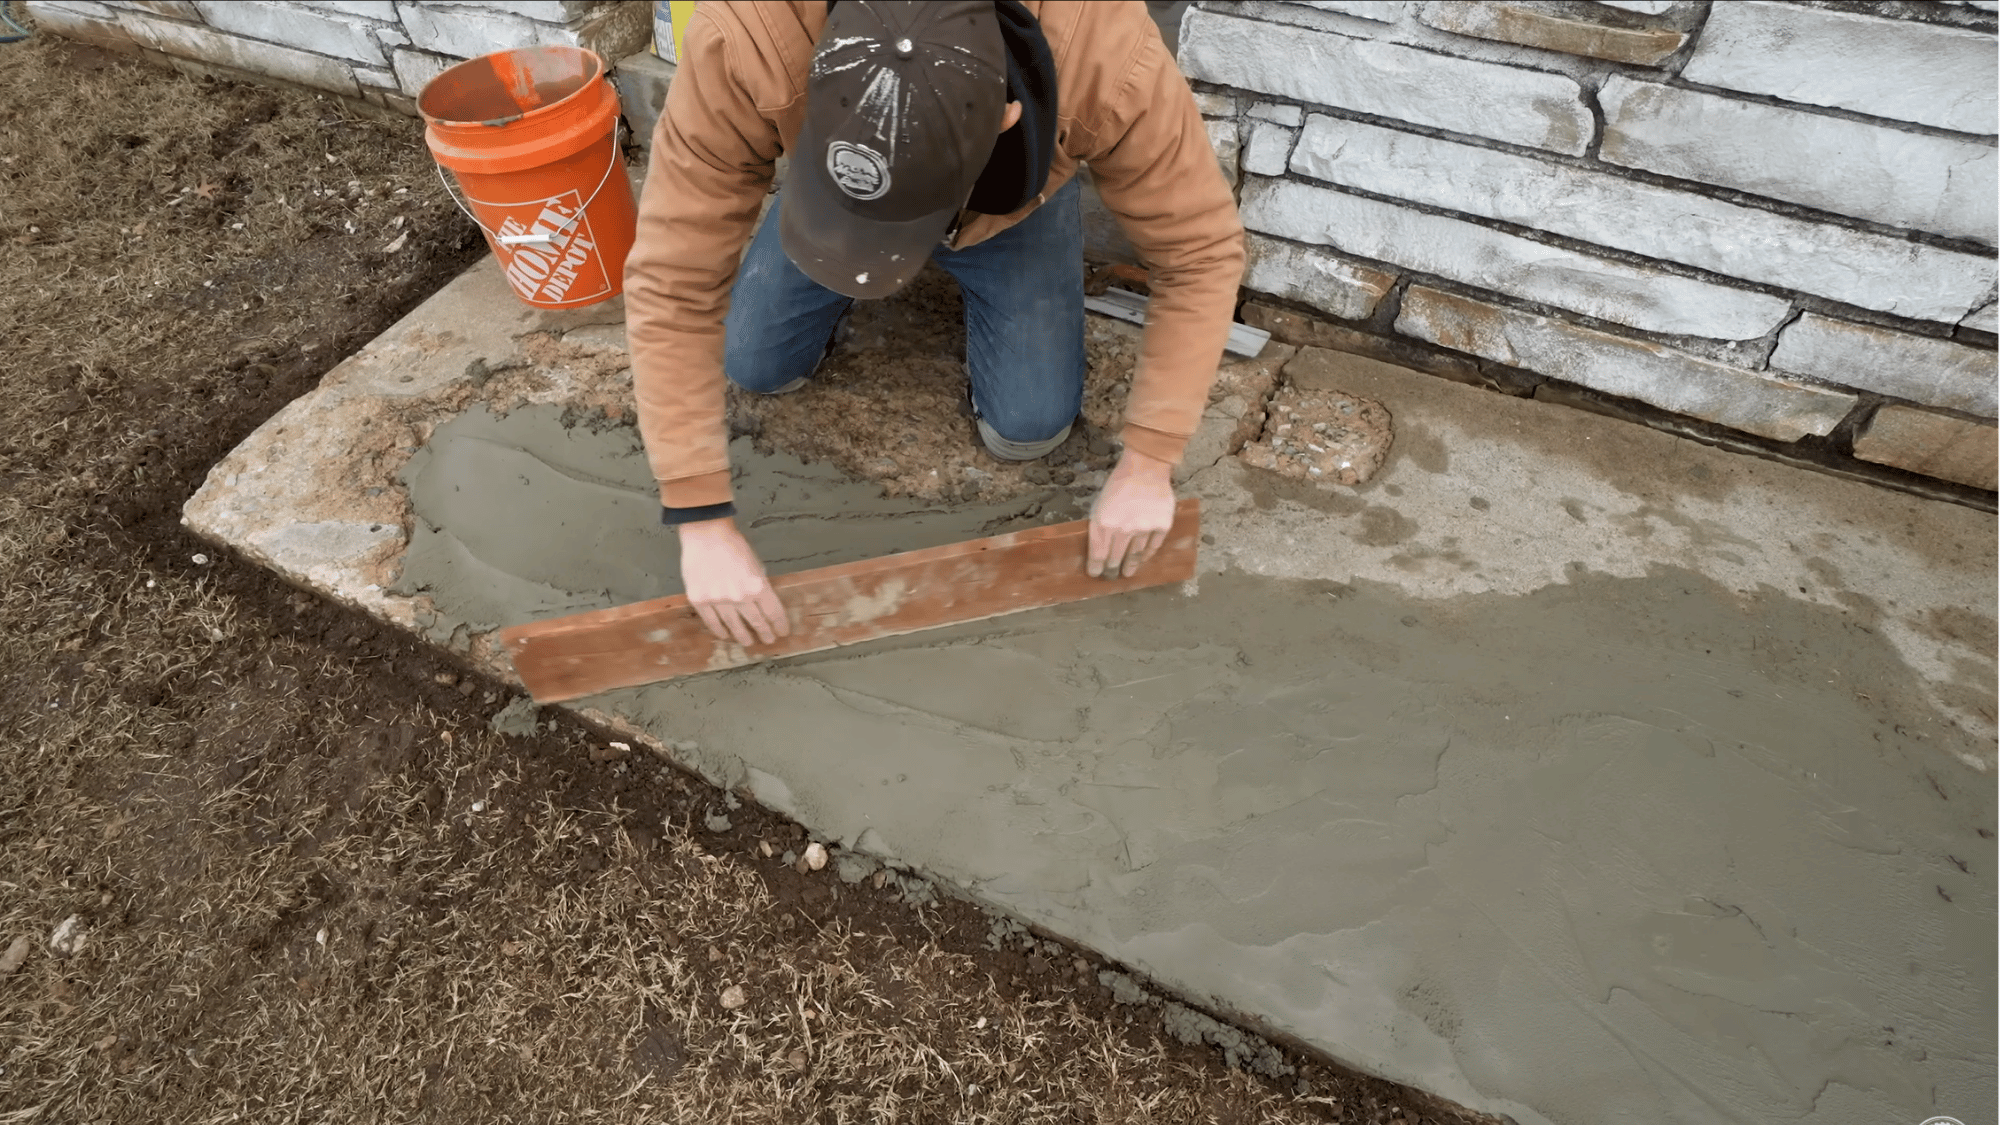
Use a straight board or screed to level the patched areas with the surrounding concrete. Check for high spots and uneven sections as you work.
A magnesium float can help smooth the surface and improve consistency. If you are repairing corners or edges, shape them carefully before the material begins to harden.
Creating a level surface now will make the resurfacing process easier and improve the final appearance.
Step 5: Smooth High Spots and Refill Low Areas
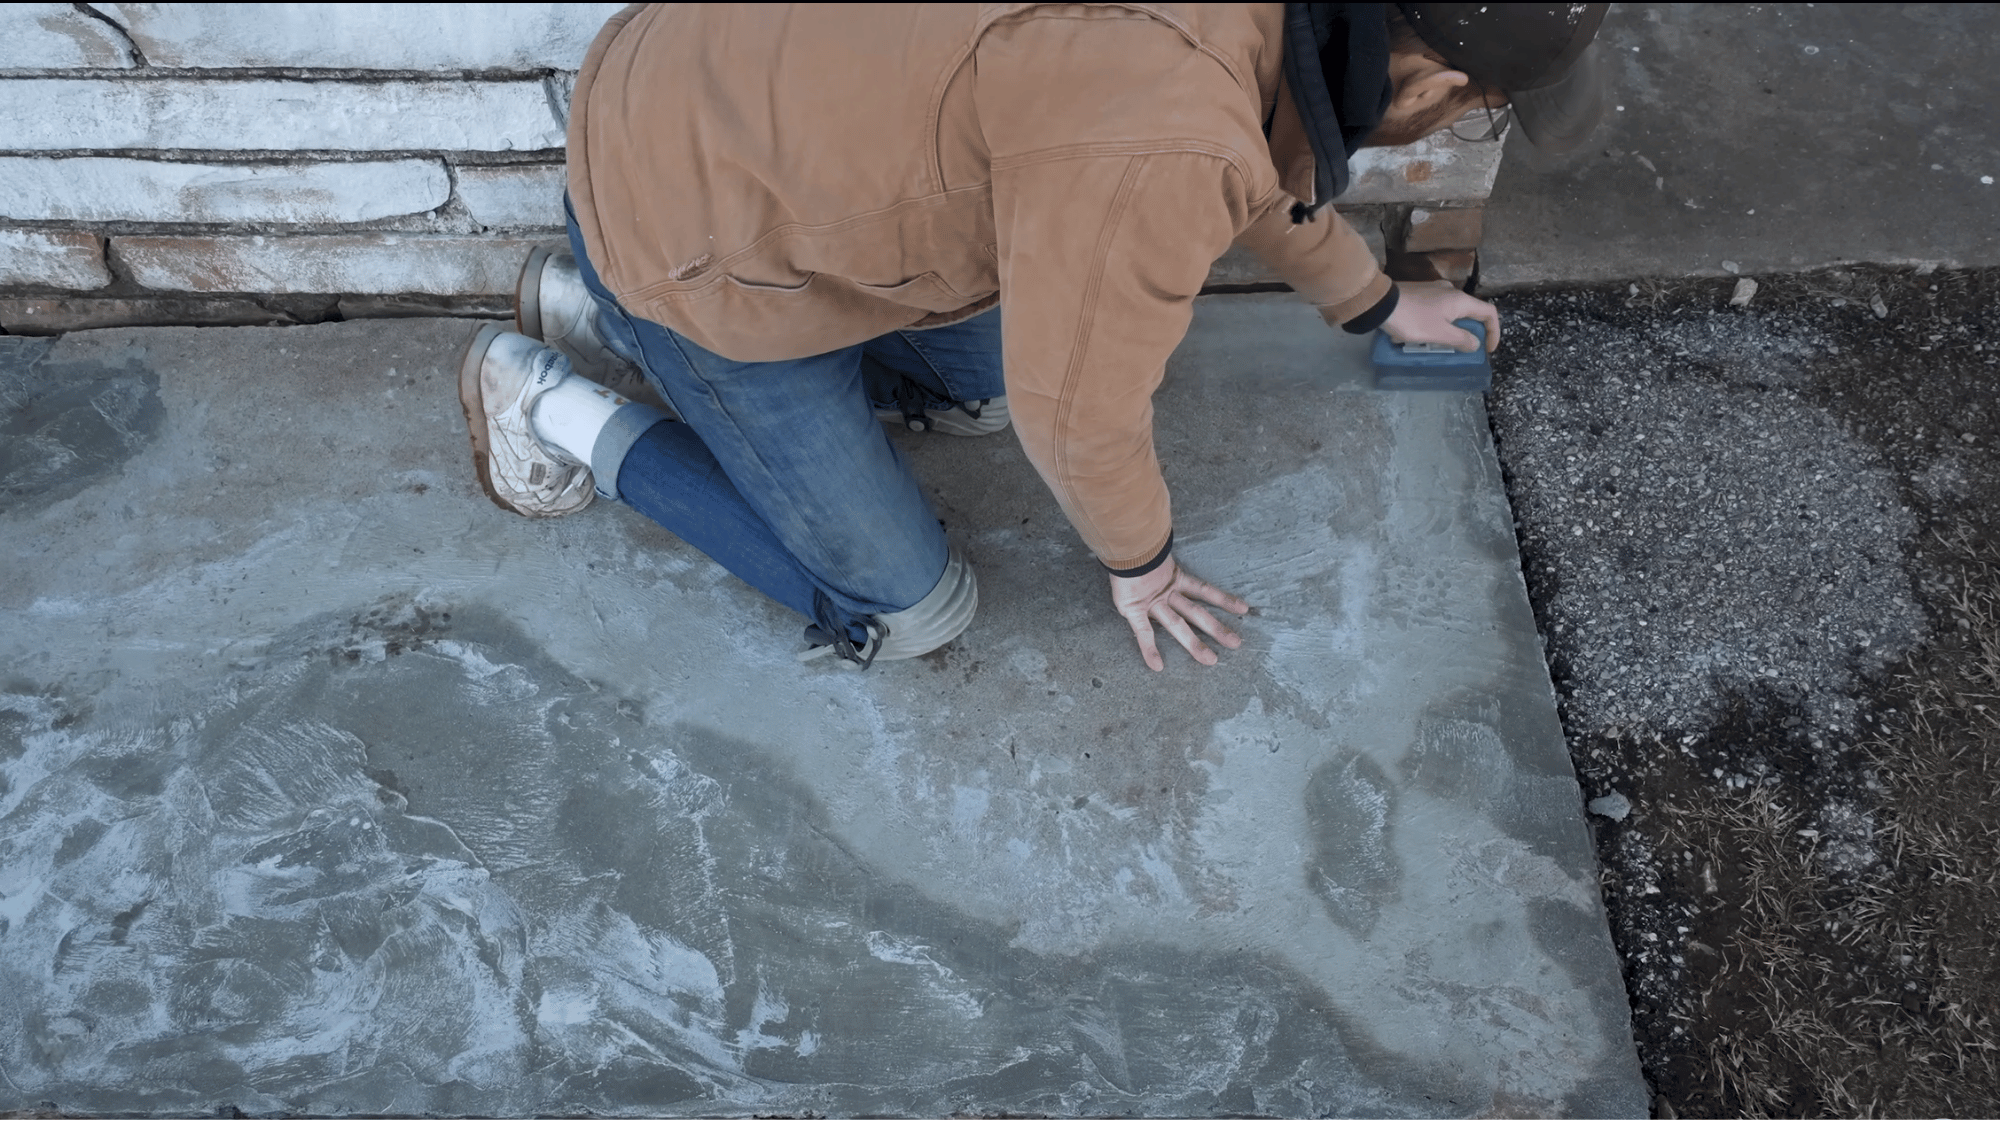
Once the patch begins to set, inspect the surface for imperfections. Use a honing block or abrasive stone to remove high spots and smooth rough areas.
If you notice any remaining low sections, apply additional patch material where needed.
Spending extra time on this step helps create a flatter surface and reduces the chance of visible imperfections showing through the resurfacer later.
Step 6: Install Edge Forms and Apply Bonding Adhesive
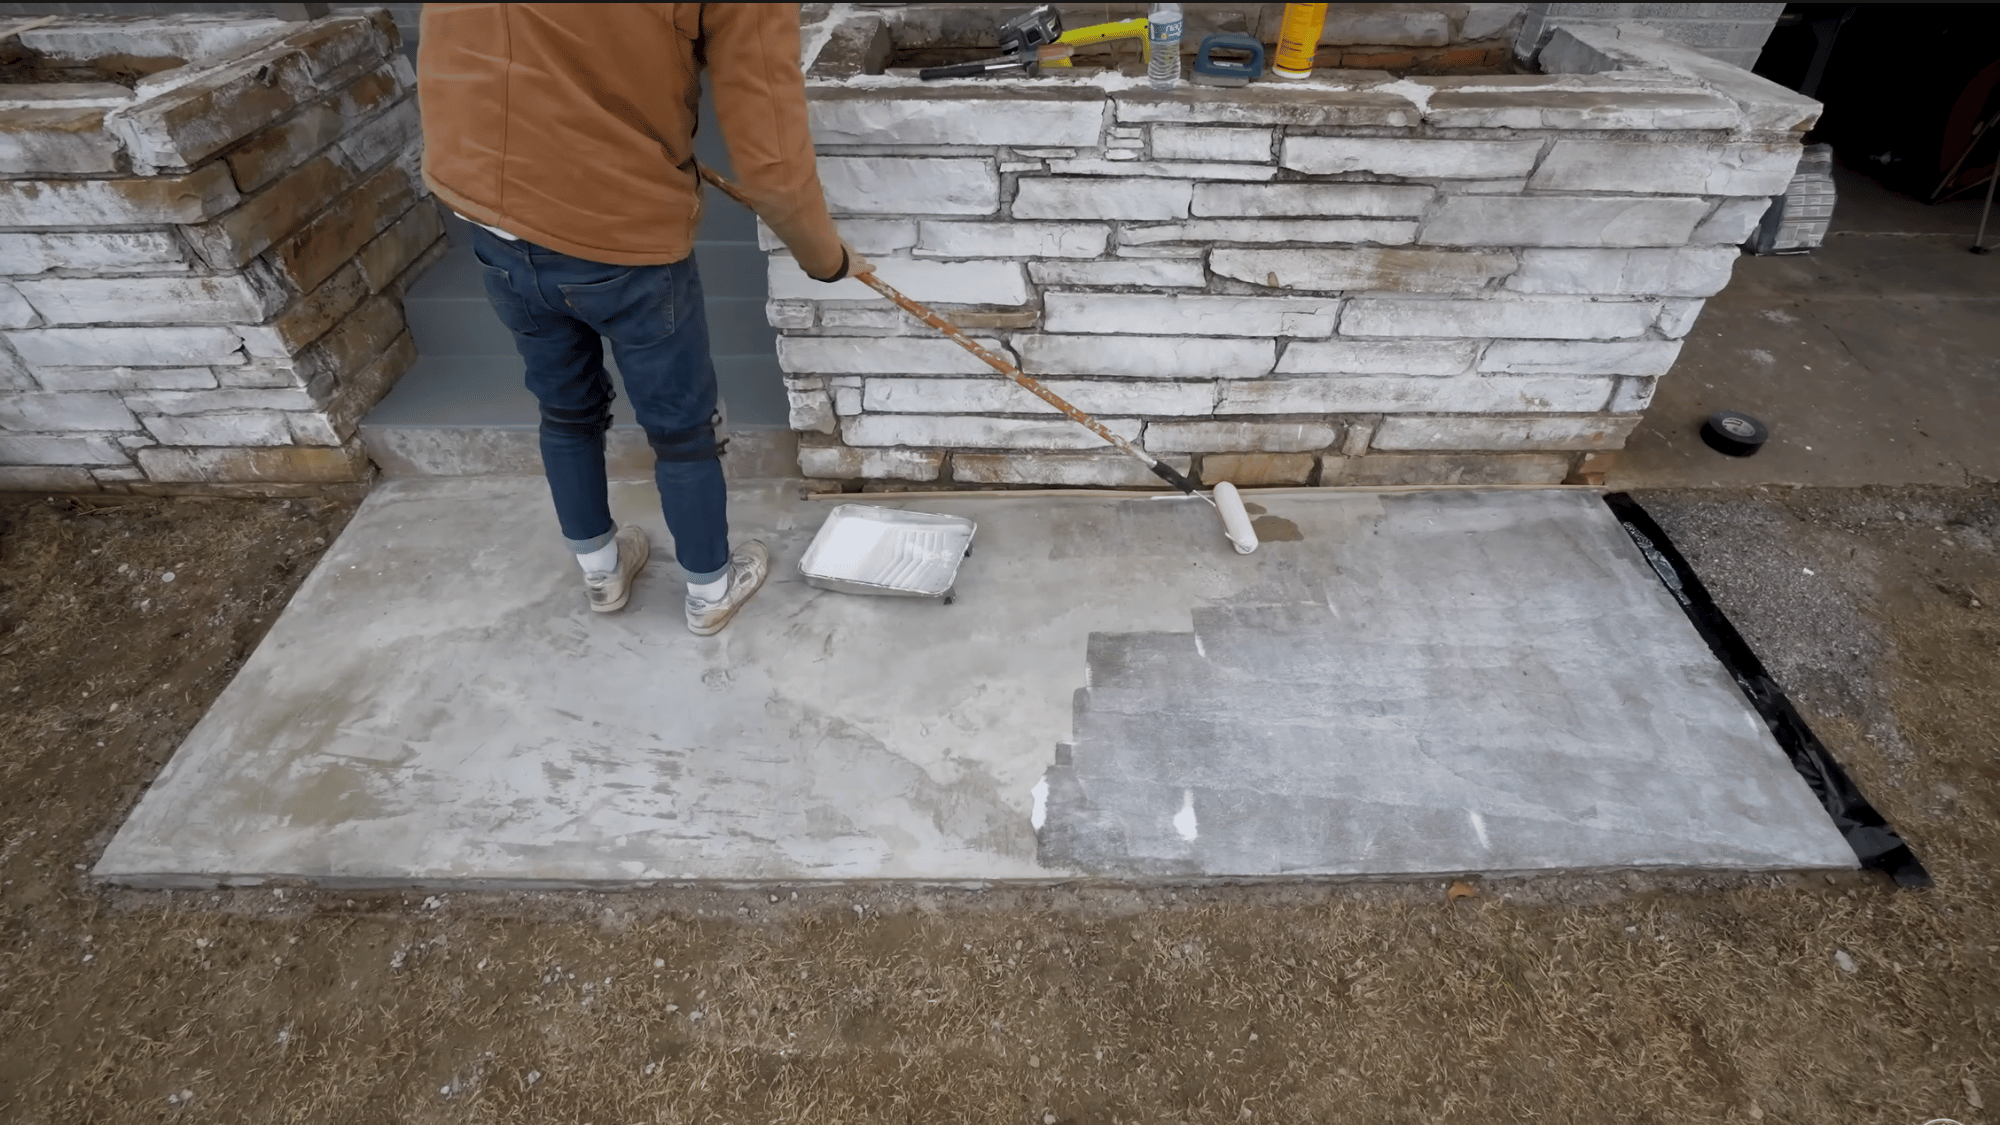
Install temporary forms or barriers around the repair area to contain the resurfacing material and create clean edges.
Protect expansion joints to prevent material from flowing into unwanted spaces. Once everything is prepared, apply a bonding adhesive using a brush or roller.
Although some resurfacing products can be applied without bonding adhesive, it often improves adhesion and helps create a stronger, longer-lasting repair.
Step 7: Mix the Concrete Resurfacer
Prepare the resurfacer according to the manufacturer’s instructions. The mixture should be smooth, pourable, and self-leveling across the concrete surface.
Using the correct water-to-product ratio is important for achieving the best results. If the mixture is too thick, it may not spread evenly.
A properly mixed resurfacer helps create a smoother finish and improves the overall appearance of the repaired concrete.
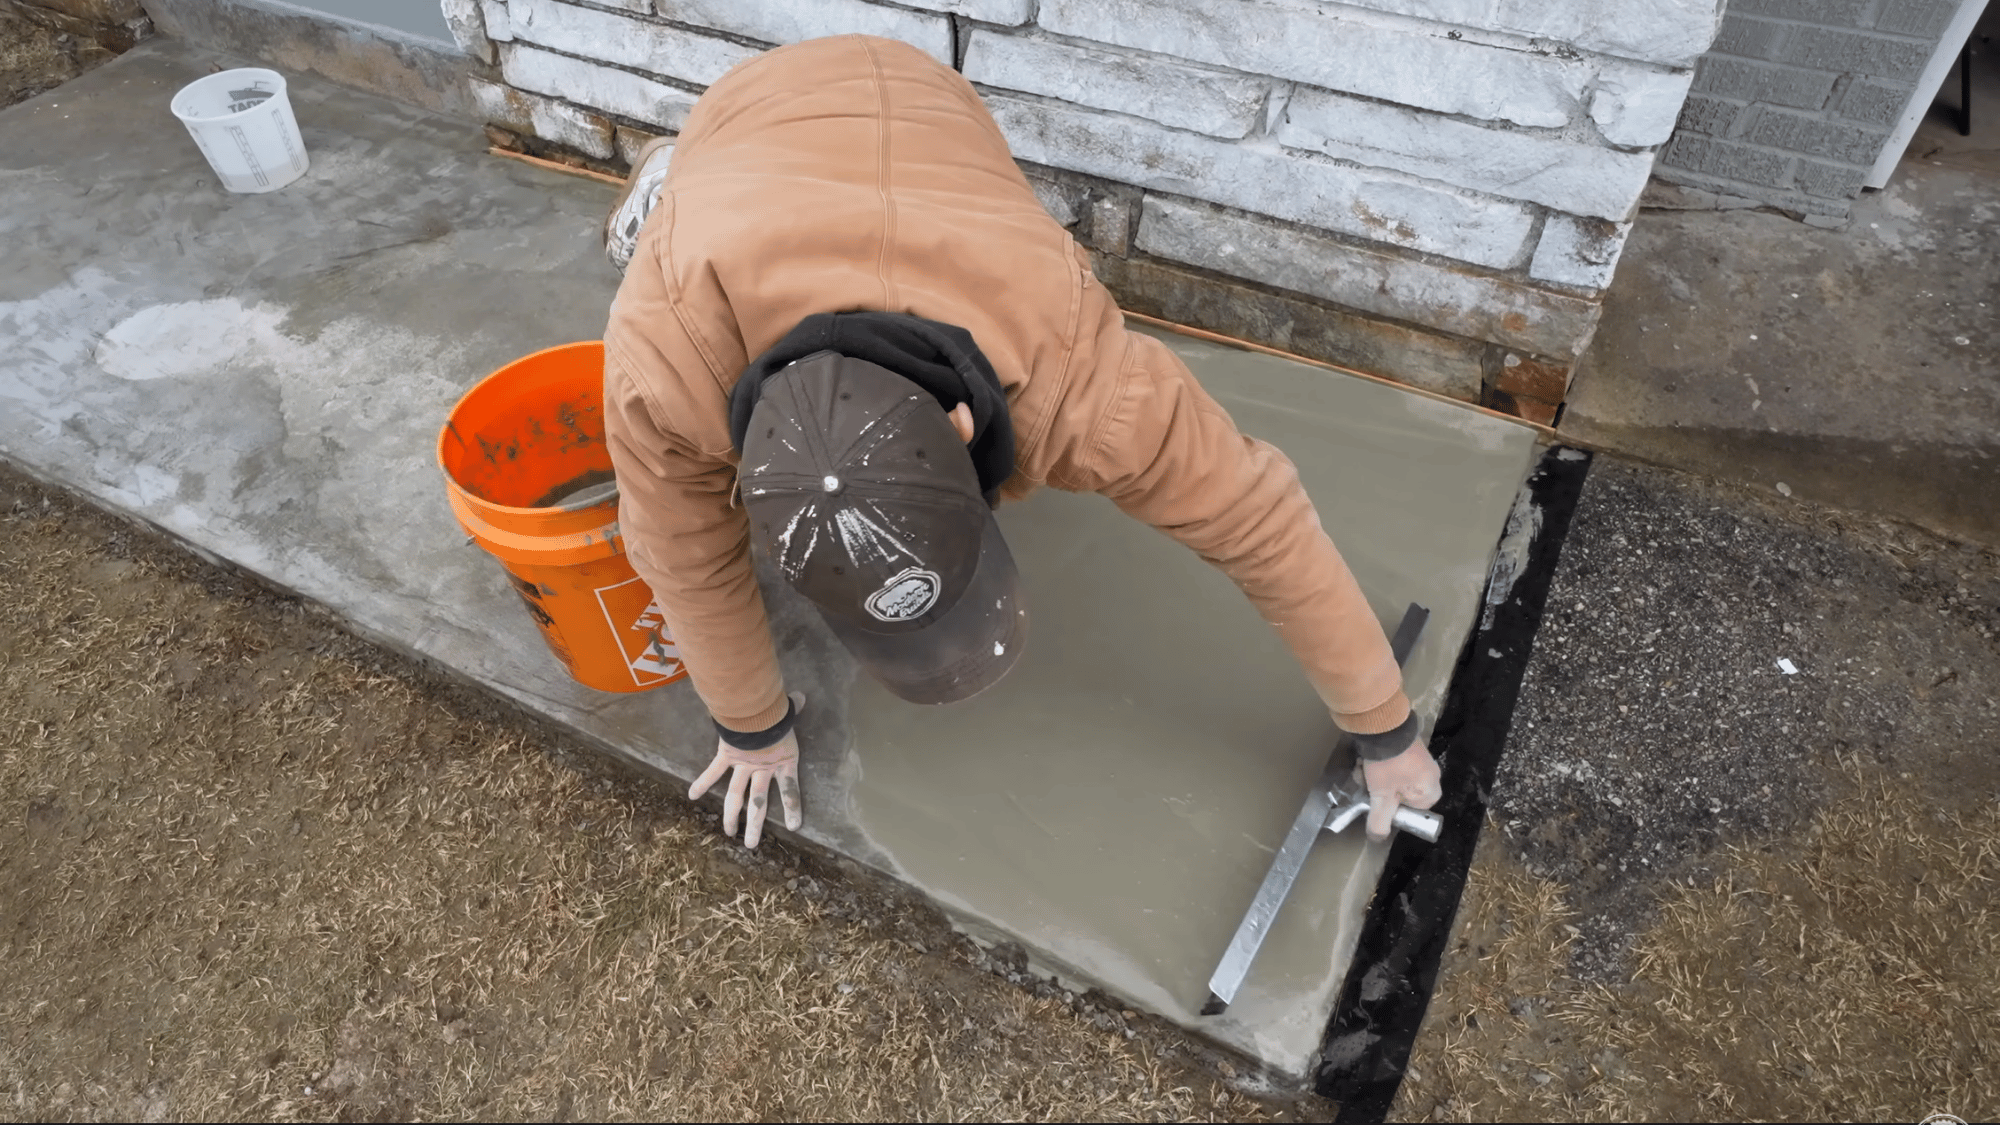
Step 8: Apply the First Coat of Resurfacer
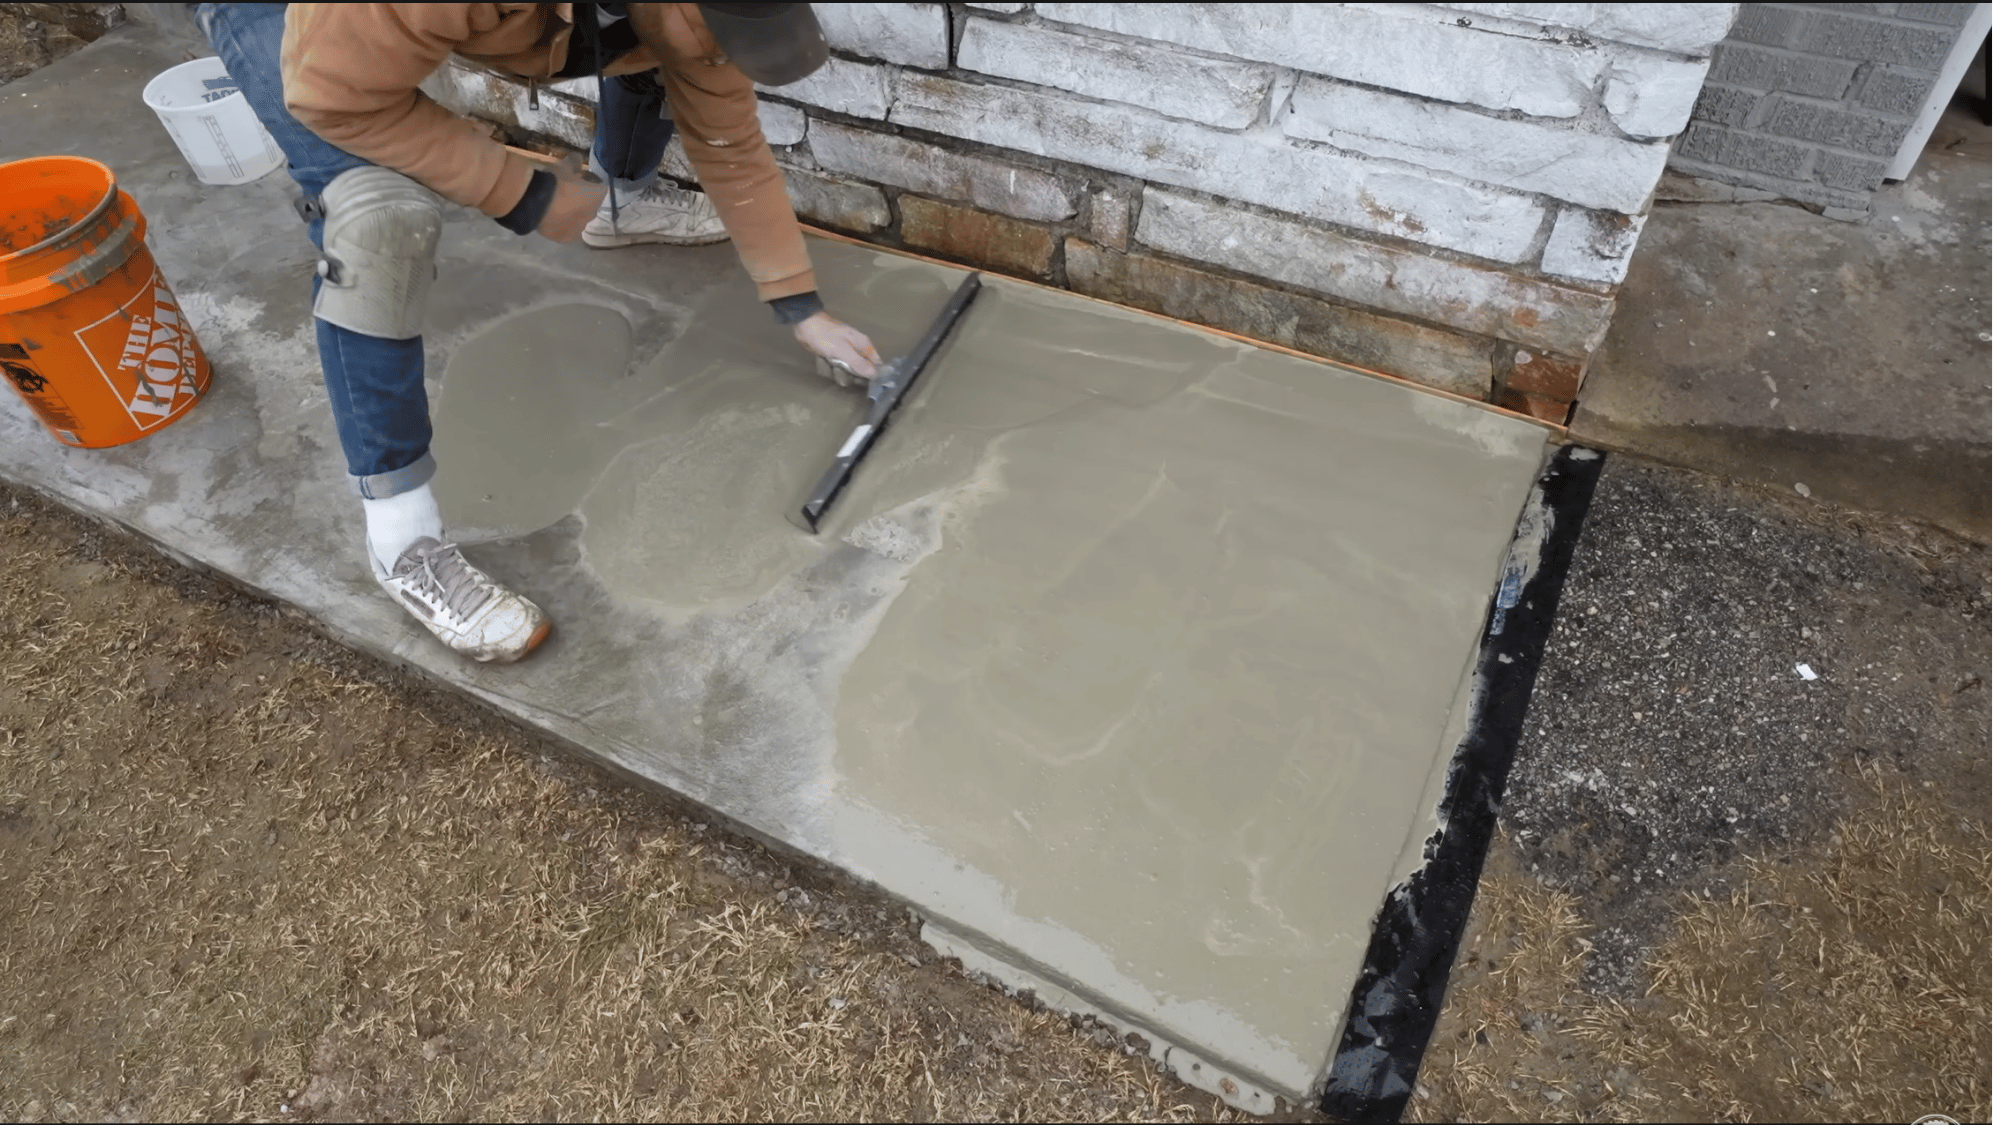
Pour the resurfacer onto the prepared concrete and spread it evenly using a squeegee or similar tool. Work the material into the surface while maintaining consistent coverage.
This first coat helps fill minor imperfections and improves the appearance of the concrete.
Be careful around edges and joints to prevent excess material from collecting in unwanted areas. Even application is key to achieving a professional-looking finish.
Step 9: Smooth the Surface and Apply a Second Coat
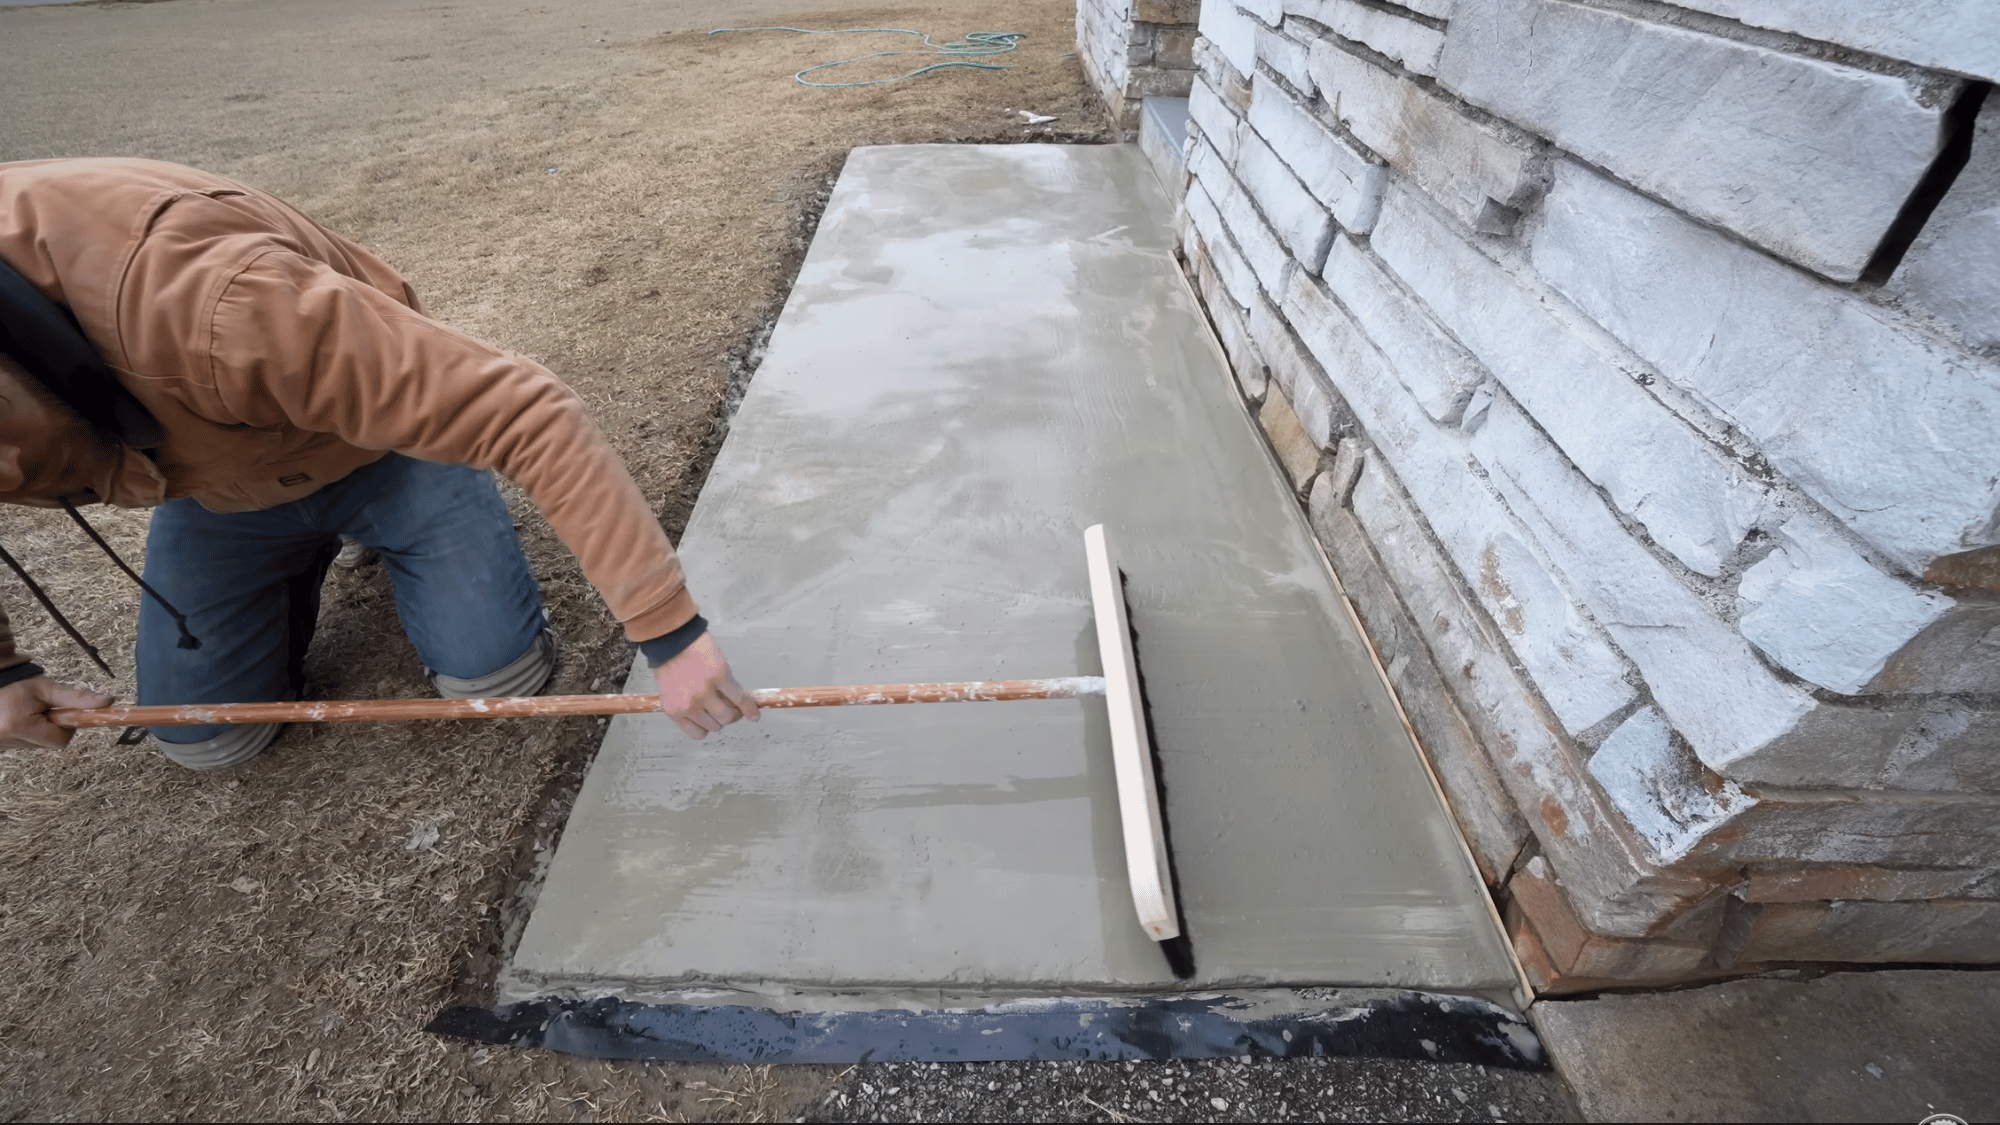
After the first coat begins to cure, smooth the surface using a broom or finishing tool. This helps remove minor imperfections and creates a more consistent texture.
Once the first coat has cured, inspect the surface carefully. If low spots or uneven areas remain, apply a second coat of resurfacer.
Multiple thin coats generally produce a better finish than a single thick application and improve the overall appearance.
Step 10: Let the Concrete Cure
Allow the repaired concrete to fully cure before returning it to service. Follow the curing time recommended by the product manufacturer and avoid foot or vehicle traffic during this period.
Keeping protective forms in place while the material hardens can help prevent accidental damage.
Proper curing allows the repair to reach its full strength and contributes to a durable, long-lasting finish.
This tutorial is based on a helpful video by Modern Builds. You can check out the original video on their YouTube channel here or watch it below.
Why Should You Repair Concrete Spalling Quickly?
Repairing concrete spalling early can prevent bigger problems and help you avoid costly repairs later.
- Damage spreads quickly: Once concrete starts breaking down, water speeds up deterioration, turning a small repair into a major restoration.
- Safety concerns increase: Loose and uneven concrete creates tripping hazards, especially for children, older adults, and visitors.
- Structural problems can develop: If damage reaches the reinforcing steel, rust can expand and weaken the structure, causing more serious damage.
- Early repairs save money: Fixing minor spalling costs far less than replacing large concrete sections or repairing serious structural damage later.
How to Prevent Concrete Spalling in the Future?
Repairing the damage is only half the battle. Taking a few preventative steps now can dramatically extend the life of your concrete and keep it looking great for years to come.
1. Improve Drainage and Moisture Control
Moisture is the number one enemy of concrete longevity. Standing water on a concrete surface will always find its way in, especially through any existing micro-cracks.
Improving how water flows away from your concrete is one of the most impactful things you can do.
Ensure your driveways and patios slope slightly away from the house to direct runoff away from the slab.
Clear gutters and downspouts regularly so they do not dump water directly onto concrete surfaces. Address any soil grading issues around basement walls or foundation concrete that allow water to pool.
2. Apply Protective Sealers and Perform Regular Maintenance
A quality concrete sealer creates a barrier that repels water and reduces the penetration of freeze-thaw damage and deicing chemicals.
It is one of the simplest and most affordable forms of preventative maintenance available. Apply a penetrating silane or siloxane sealer to exterior concrete surfaces every 2 to 3 years for maximum protection.
Avoid using chloride-based deicing salts on concrete. Opt for sand or calcium magnesium acetate instead.
Inspect your concrete each spring after the freeze-thaw season and address any new cracks or surface damage before they have a chance to develop.
3. Fix Small Cracks Before They Worsen
Minor cracks may seem harmless, but they often become entry points for water, salts, and other contaminants. Once moisture penetrates the concrete, freeze-thaw cycles can rapidly expand the damage and lead to spalling.
Inspect concrete surfaces regularly for hairline cracks, chipped edges, or signs of surface deterioration. Seal small cracks with an appropriate concrete crack filler as soon as they appear.
Prompt repairs help prevent moisture intrusion and reduce the likelihood of larger, more expensive repairs in the future.
4. Use Proper Concrete Mixes and Installation Practices
Many spalling problems can be traced back to poor installation or low-quality concrete mixes.
Concrete that contains the correct water-to-cement ratio, proper air entrainment, and adequate reinforcement is far more resistant to weather-related damage.
For new concrete or damaged sections, hire experienced contractors who follow best practices.
Proper curing during the first few weeks is equally important, as it allows the concrete to achieve its intended strength and durability.
5. Minimize Heavy Loads and Surface Stress
Excessive weight and repeated impact can weaken concrete surfaces over time, making them more vulnerable to cracking and spalling.
Driveways, garage floors, and industrial slabs are prone to damage from heavy vehicles and equipment.
Avoid placing loads on concrete that exceed its design capacity. Use protective pads beneath heavy machinery and distribute weight evenly whenever possible.
Reducing unnecessary stress helps preserve the integrity of the concrete and extends its service life.
How Much Does Concrete Spalling Repair Cost?
Concrete spalling repair typically costs between $3 and $15 per square foot, depending on the severity of the damage, repair method, and whether you hire a professional or tackle the project yourself.
The total cost of repairing concrete spalling varies based on the size of the damaged area and the extent of the deterioration.
Small DIY repairs often cost between $50 and $300 for patching materials, bonding agents, and sealers. Professional repairs are more expensive, especially when resurfacing, reinforcement repair, or structural work is required.
Driveways, patios, sidewalks, and foundation walls may all have different repair costs due to accessibility and labor requirements.
Addressing spalling early is usually the most cost-effective approach and helps prevent more expensive repairs later.
When to Call a Professional?
DIY concrete repair is very doable for most homeowners, but there are situations where calling in a professional contractor is absolutely the right call.
| Condition / Indicator | Description |
| Large or deep damage | The spalling covers a very large area or goes deeper than about 1/3 of the slab’s thickness. |
| Extensive rebar corrosion | You can see widespread rebar corrosion, which indicates deeper structural compromise. |
| Structural concrete involvement | The damage is on structural or load-bearing concrete, such as a foundation wall, beam, or column. |
| Uncertainty about the repair | You are not confident in your ability to properly assess the extent of the damage or carry out the repair safely. |
Is Concrete Spalling Dangerous?
Yes, concrete spalling can be dangerous, especially when the damage is left unrepaired for an extended period.
While minor surface flaking may seem like a cosmetic issue, it can quickly develop into a safety and structural concern.
Spalling concrete creates uneven surfaces, loose fragments, and deep pits that can become tripping hazards for pedestrians.
On driveways, sidewalks, and patios, damaged areas may worsen over time as moisture penetrates deeper into the slab.
In reinforced concrete structures, spalling can expose steel reinforcement to water and oxygen, leading to corrosion and expansion.
Repairing spalling early helps prevent accidents, limits repair costs, and protects the long-term strength and durability of the concrete surface.
Common Mistakes to Avoid During Concrete Spalling Repair
Even with the right materials and good intentions, certain mistakes can significantly reduce the effectiveness of a concrete spalling repair.
- Skipping the Bonding Adhesive: Without a bonding agent, the repair material may not properly adhere to the existing concrete. This often leads to cracking, delamination, or patch failure within a short period.
- Not Removing Enough Damaged Concrete: Leaving behind loose, weak, or deteriorated concrete creates an unstable base for the repair. Thorough surface preparation is essential for a durable bond.
- Using the Wrong Repair Product: Different repair products are designed for specific depths, locations, and environmental conditions. Choosing the wrong material can result in poor performance and premature failure.
- Rushing the Cure Time: Concrete repair products require adequate curing time to reach full strength. Walking, driving, or placing heavy loads on the repaired area too soon can compromise the repair.
- Ignoring the Root Cause: Repairing the visible damage without addressing underlying issues such as poor drainage, water infiltration, or freeze-thaw exposure will likely result in spalling returning over time
Conclusion
Repairing concrete spalling may look like a big job at first, but it becomes much easier when you take it one step at a time.
Once you clean the surface, remove loose concrete, patch the damaged spots, and allow the repair to cure properly, you can bring the slab back to a stronger state.
The most important thing is not to rush the process. Good prep work and the right repair product make a real difference in how long the fix lasts.
It also helps seal the surface and prevent water from pooling on the concrete in the future.
If you have dealt with spalling on a driveway, patio, sidewalk, or garage floor, share your experience in the comments below.
Your tips may help someone else repair their concrete with more confidence.
Frequently Asked Questions
Can Concrete Spalling Be Repaired without Hiring a Professional?
Yes, small to medium areas of concrete spalling can often be repaired as a DIY project using the right tools and materials. Large or structural damage should be evaluated by a professional.
How Long Does a Concrete Spalling Repair Typically Last?
A properly completed repair can last 10 years or more when the surface is prepared correctly, repaired with quality materials, and properly sealed.
What Products Work Best for Concrete Spalling Repair?
Polymer-modified repair mortars and resurfacers are generally the best options. The right product depends on the depth and severity of the damage.
Does Concrete Spalling Always Require Full Slab Replacement?
No, many cases of concrete spalling can be repaired successfully. However, severe damage or deep deterioration may require replacement.
What Helps Prevent Concrete Spalling During Winter?
Applying a penetrating sealer, avoiding chloride-based deicing salts, and performing regular inspections can help prevent winter spalling.