")
The backyard has a way of making ordinary things feel different, and an outdoor shower is no exception.
A DIY outdoor shower brings that resort feeling home without the resort price tag, the contractor, or the torn-up yard most people expect.
What surprises most first-timers is how manageable the whole thing actually is once the planning, materials, and sequencing click into place.
Everything from site selection and drainage to permits and winterizing is laid out ahead; read through before picking up a single tool.
Planning Your DIY Outdoor Shower
A bit of upfront planning saves you from having to redo things later. These three choices shape your layout, cost, and how easy the shower is to use.
Where to Put it?
Pick a spot that’s close to a water source so you’re not running long pipes. Shorter runs mean less cost and fewer installation headaches overall.
Afternoon sun is a big plus because it naturally warms the space and makes even cold-water setups feel more comfortable for daily outdoor use.
Try to use natural privacy like a fence or tall plants. It keeps things simple and avoids building extra screens or structures from scratch.
Keep it a few feet away from your house foundation. This helps avoid water pooling near walls and reduces any long-term moisture problems.
How Much Space is Required?
Think about comfort first. If it’s too tight, it’ll feel awkward every time you use it, especially when turning or reaching for things inside.
A 3-by-3-foot space works for a basic setup where you just need enough room to stand and move around comfortably.
Go for 4 by 4 feet if you can. That extra space is useful for a small shelf or even a simple bench.
More space now also means easier upgrades later, without tearing anything down or starting from scratch.
Hot or Cold Water?
This choice really sets the direction for everything else. It affects your budget, plumbing work, and how often you’ll actually use the shower.
Cold water only is the simplest option. It connects directly to your outdoor spigot, keeping the whole build quick and affordable.
Hot and cold water require extra plumbing, which means more work and cost, but they give you year-round comfort and better usability overall.
How to Build an Outdoor Shower: Step-By-Step Method
Here’s where the plan becomes a real shower. Take it one step at a time, and a basic build comes together in a single weekend.
Tools and Materials You’ll Need
- Shower kit or fixture
- Stainless or brass shower head
- Pavers or slatted wood for the floor
- Gravel
- Landscape fabric
- Plumber’s tape
- Drill
- Level
- Saw for cutting pavers or framing
With your materials staged, you’re ready to build.
1. Plan and Dig Post Holes
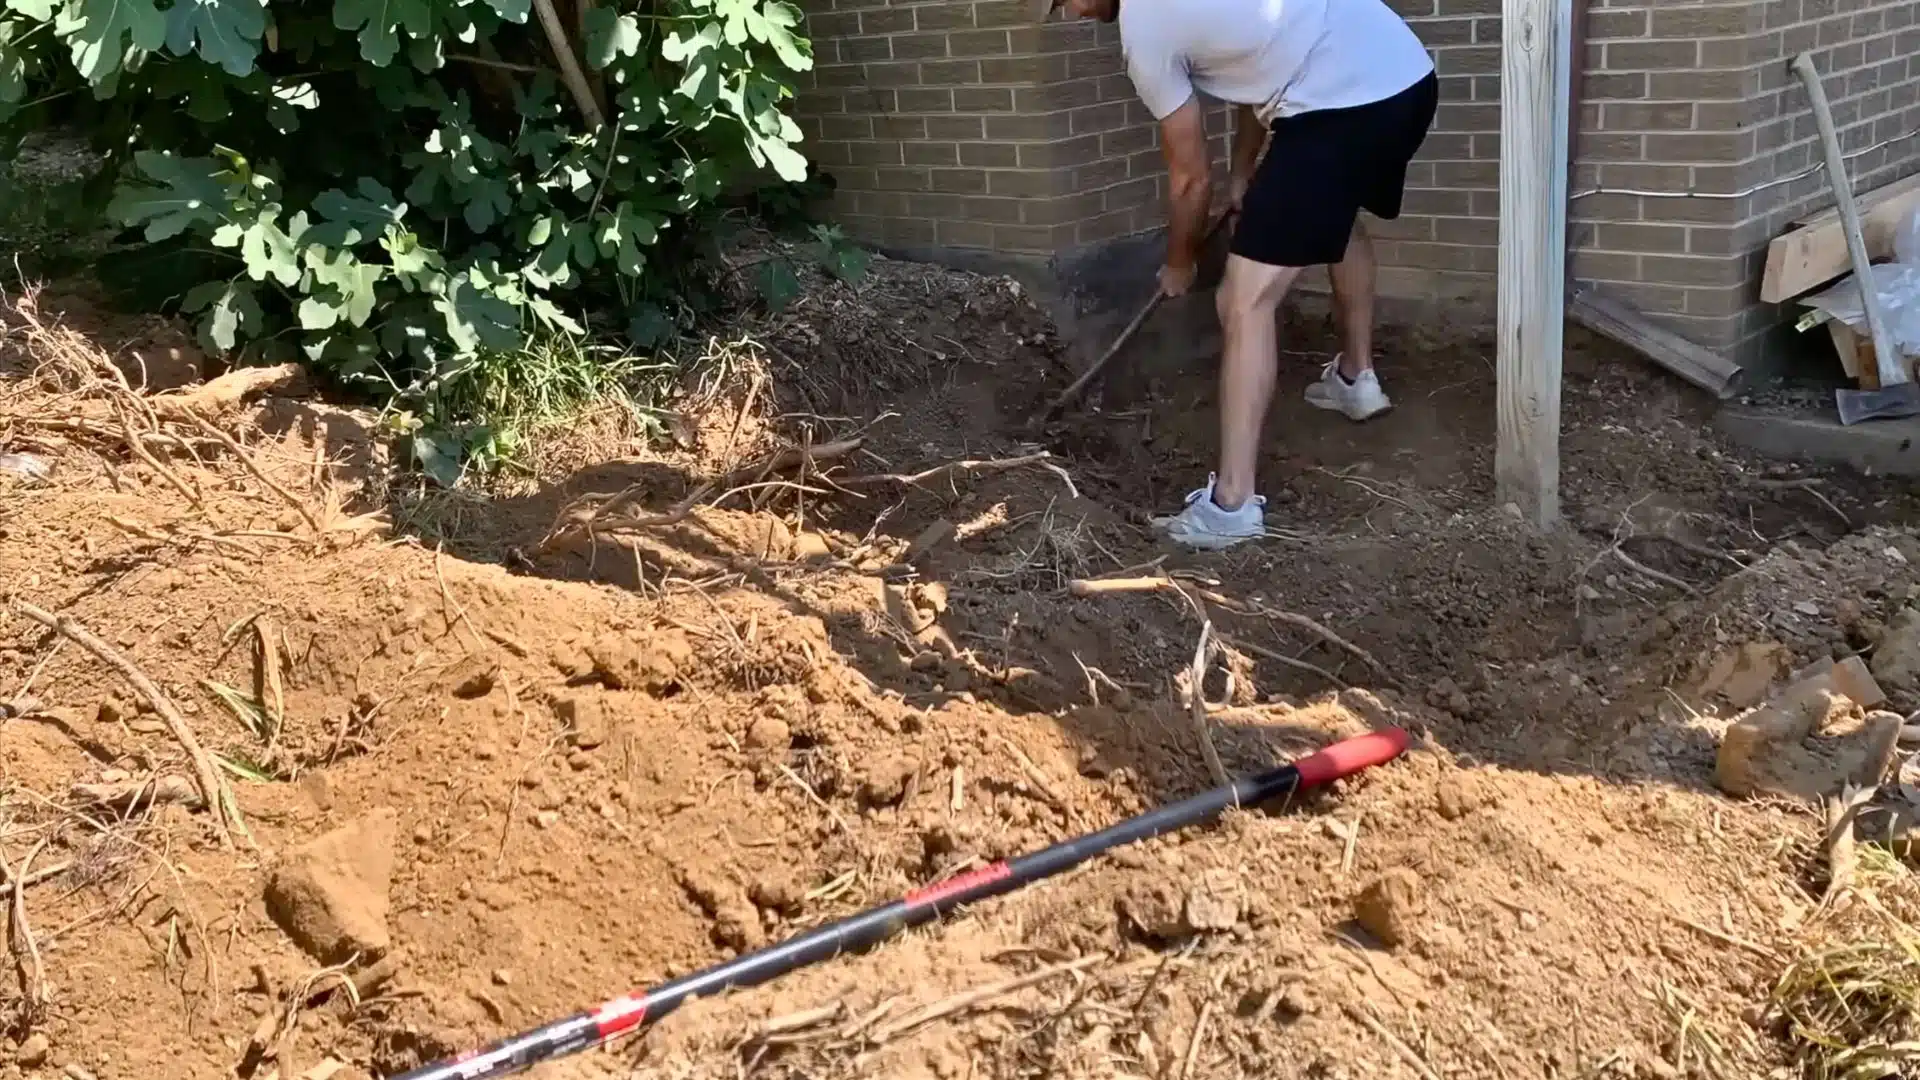
Mark your layout first, so the whole structure stays square and aligned. Pick a spot with easy access to water and well-draining ground.
Dig four holes deep enough to anchor strong posts, usually about two feet. Drop a few inches of gravel in each one to help drainage and keep the wood from rotting.
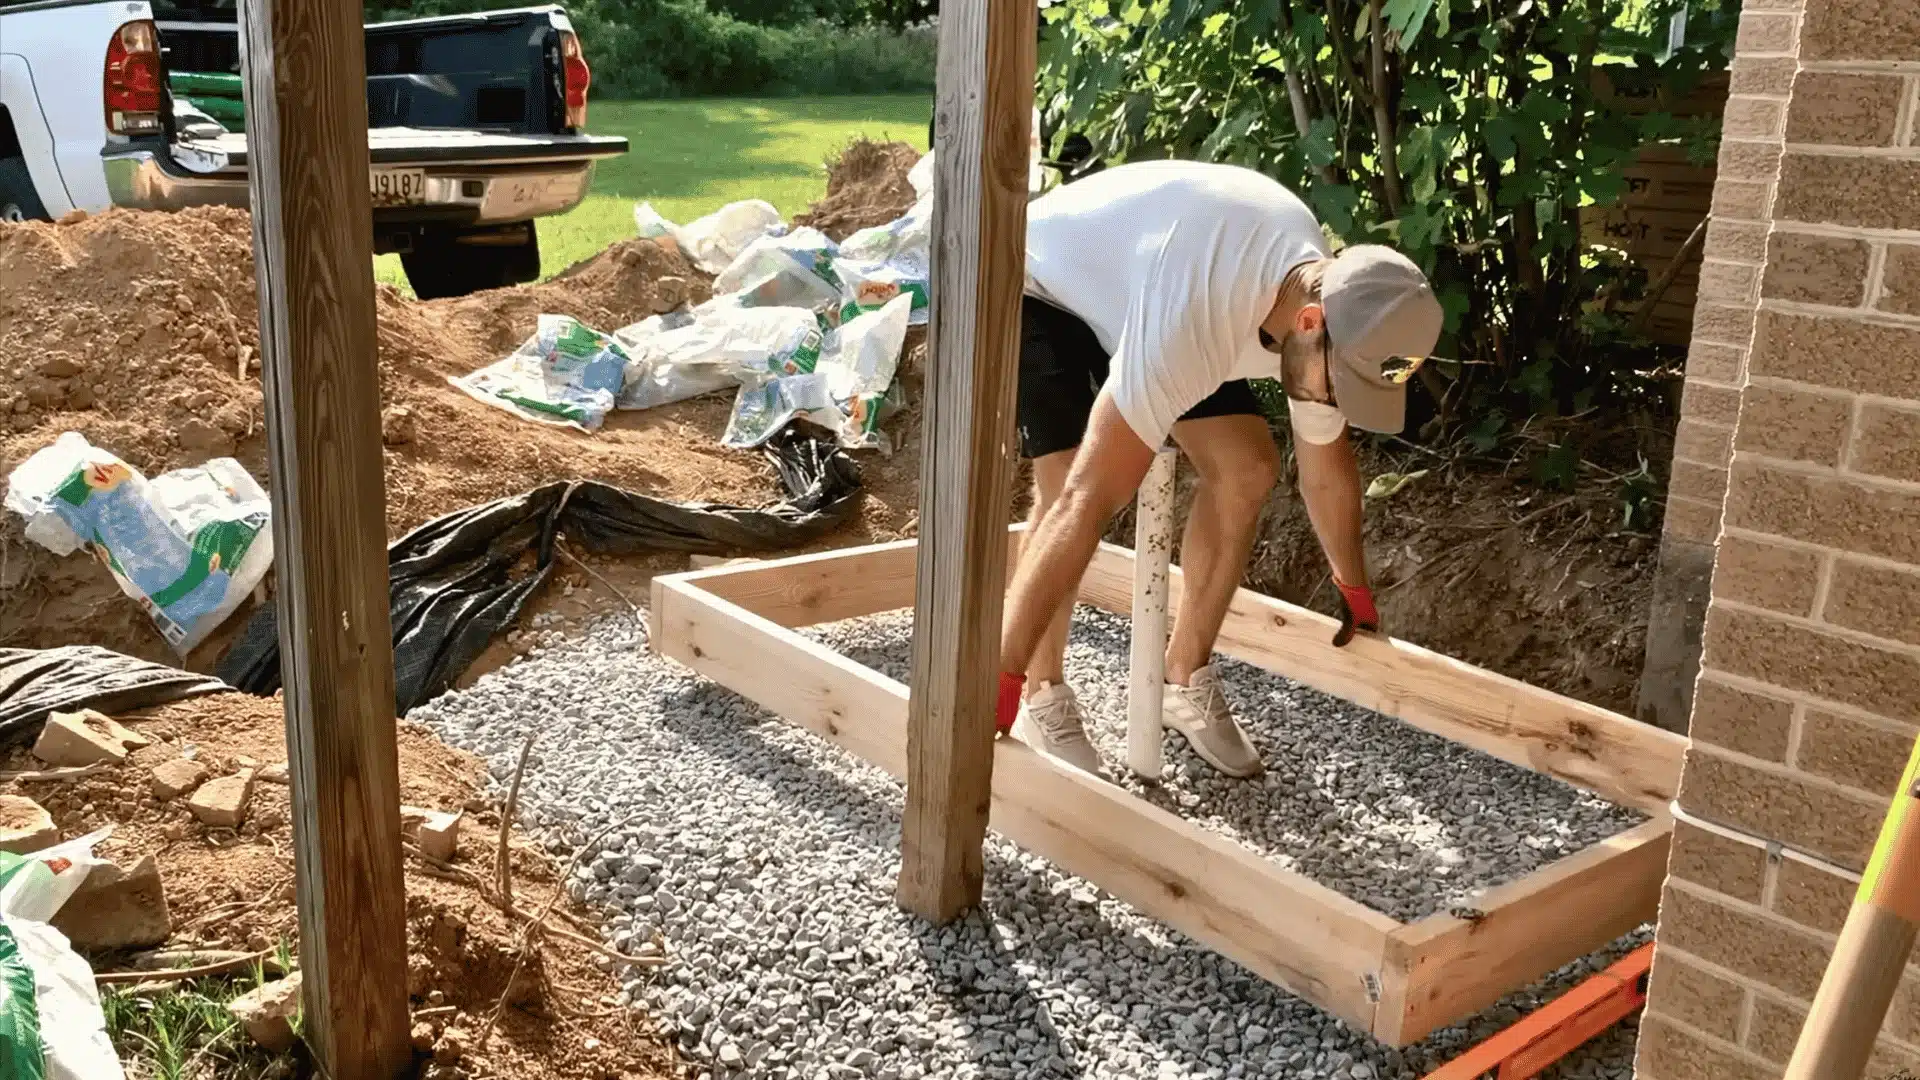
2. Install and Secure the Posts
Set each post in its hole and check it with a level, since a leaning post throws off everything above it. Hold it steady with scrap-wood braces.
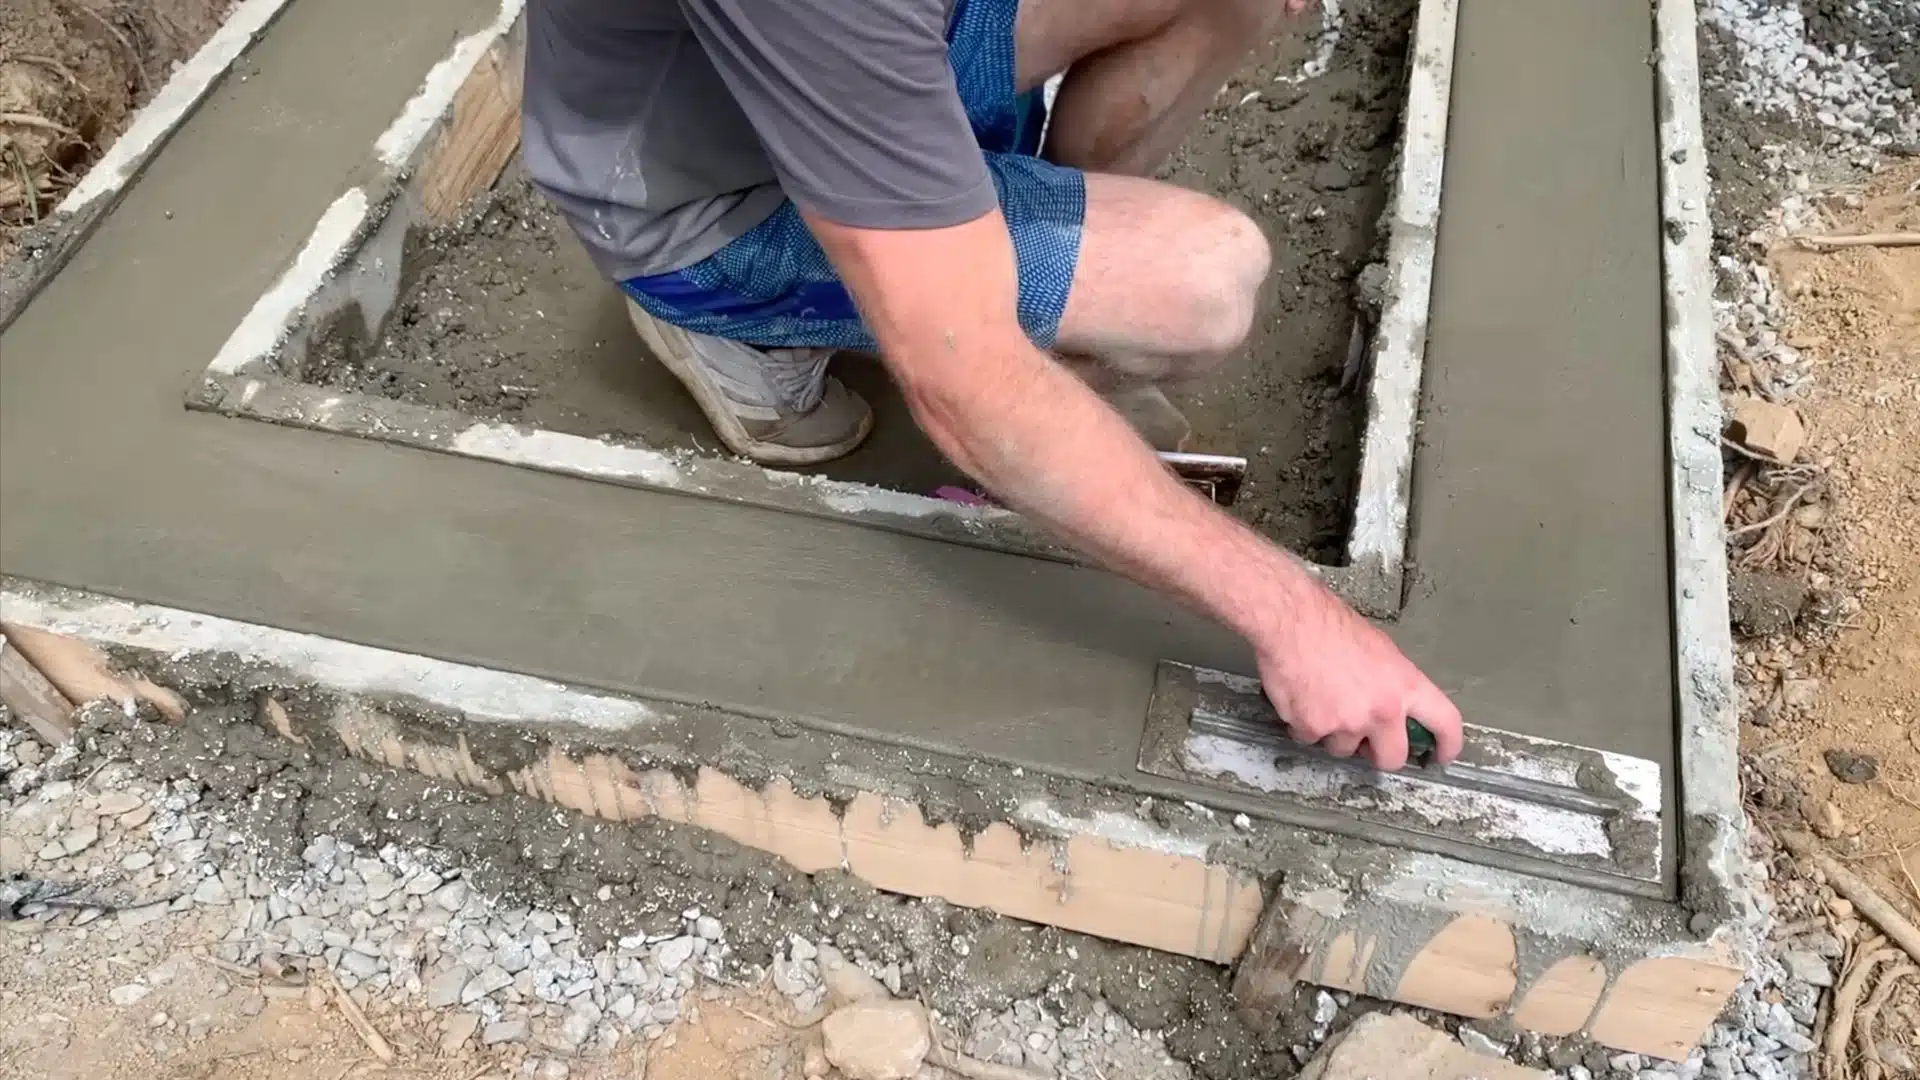
Once all four are lined up, pour in fast-setting concrete and add water per the bag instructions. Let it fully harden, usually a few hours, before you build on it.
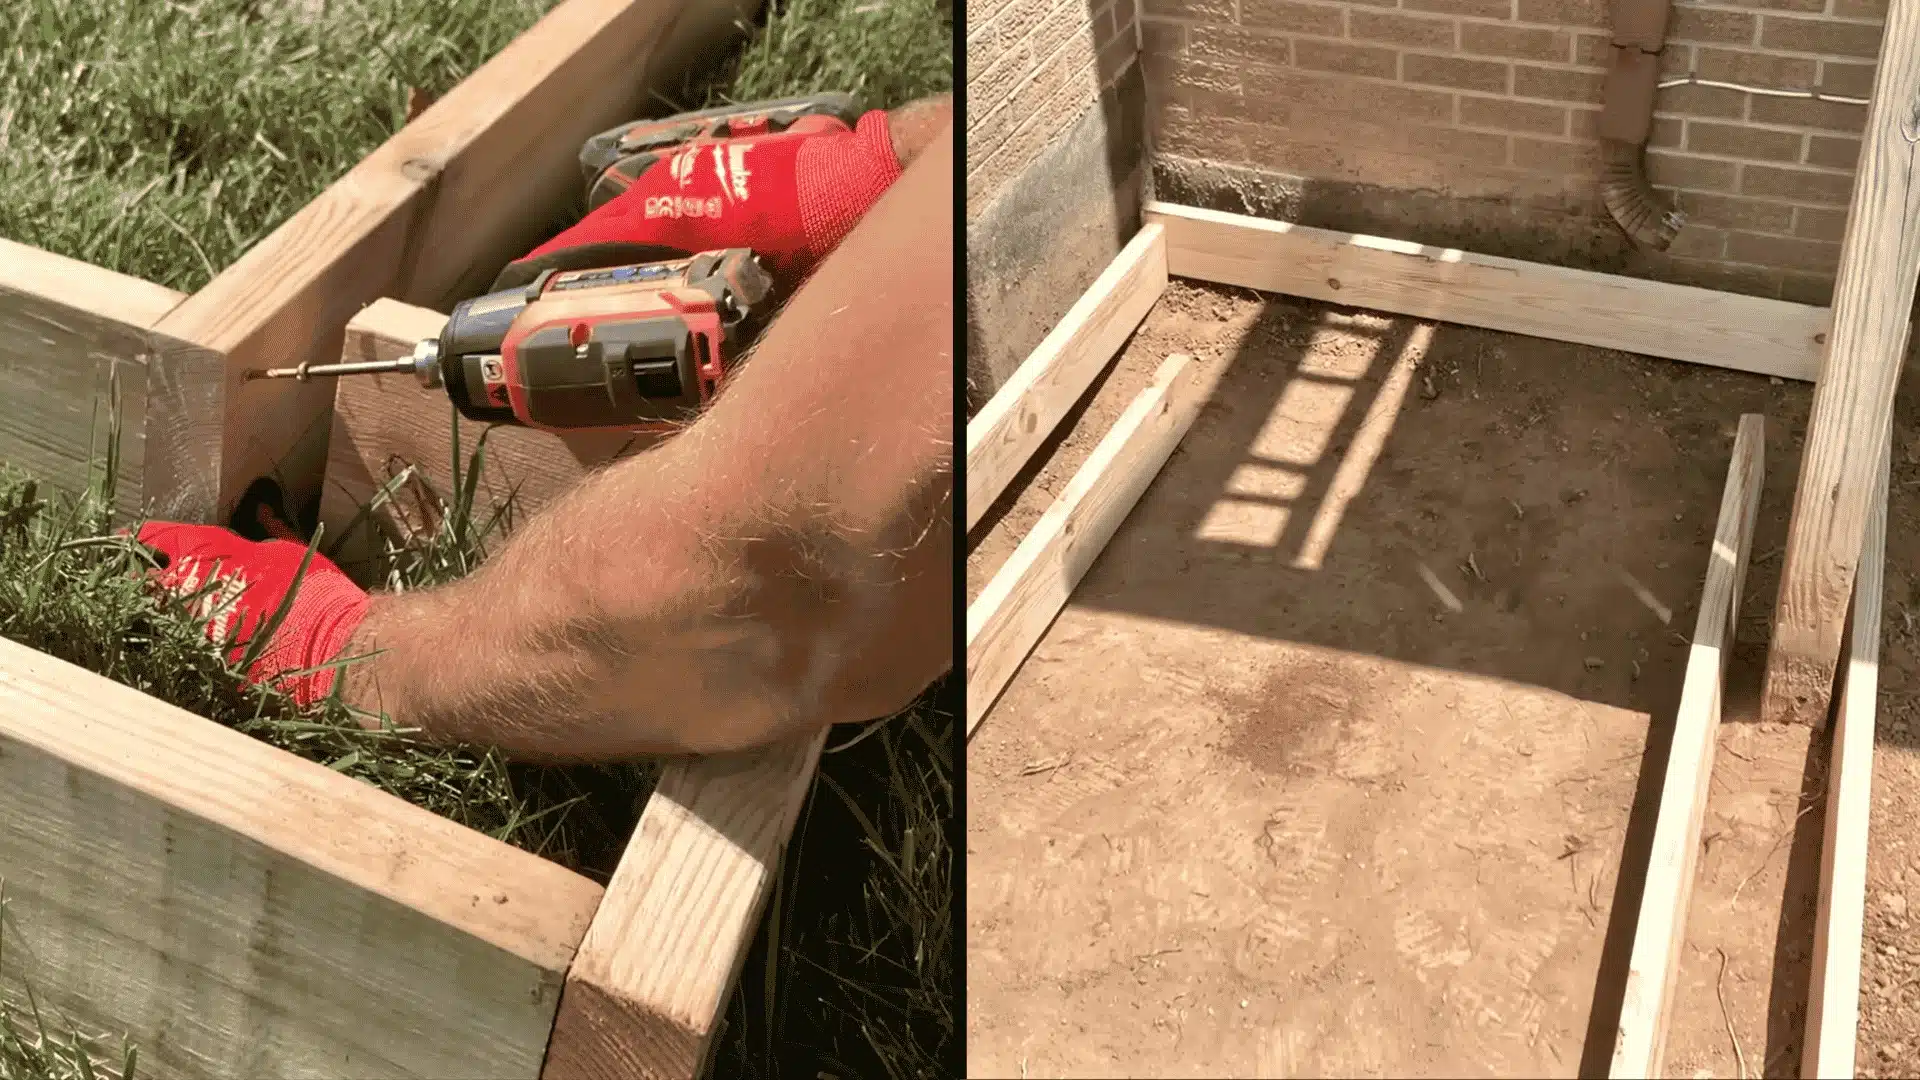
3. Prepare the Shower Floor
Clear the area inside the frame and remove grass, roots, and loose soil. Level the ground properly and shape a slight slope so that water naturally drains away rather than pooling.
Lay a weed barrier fabric across the surface to block plant growth. Add a layer of sand or fine gravel on top and level it to create a firm, stable base for the floor.
4. Build the Ground Frame for the Washroom
Attach horizontal boards between the posts to form a strong support frame for the structure. This frame holds the load of the walls and keeps the overall build stable and aligned.
Make sure all joints are secure, and the frame sits level on the posts. A properly aligned base prevents shifting and keeps the rest of the structure square during assembly.
5. Build the Walls and Seal the Wood
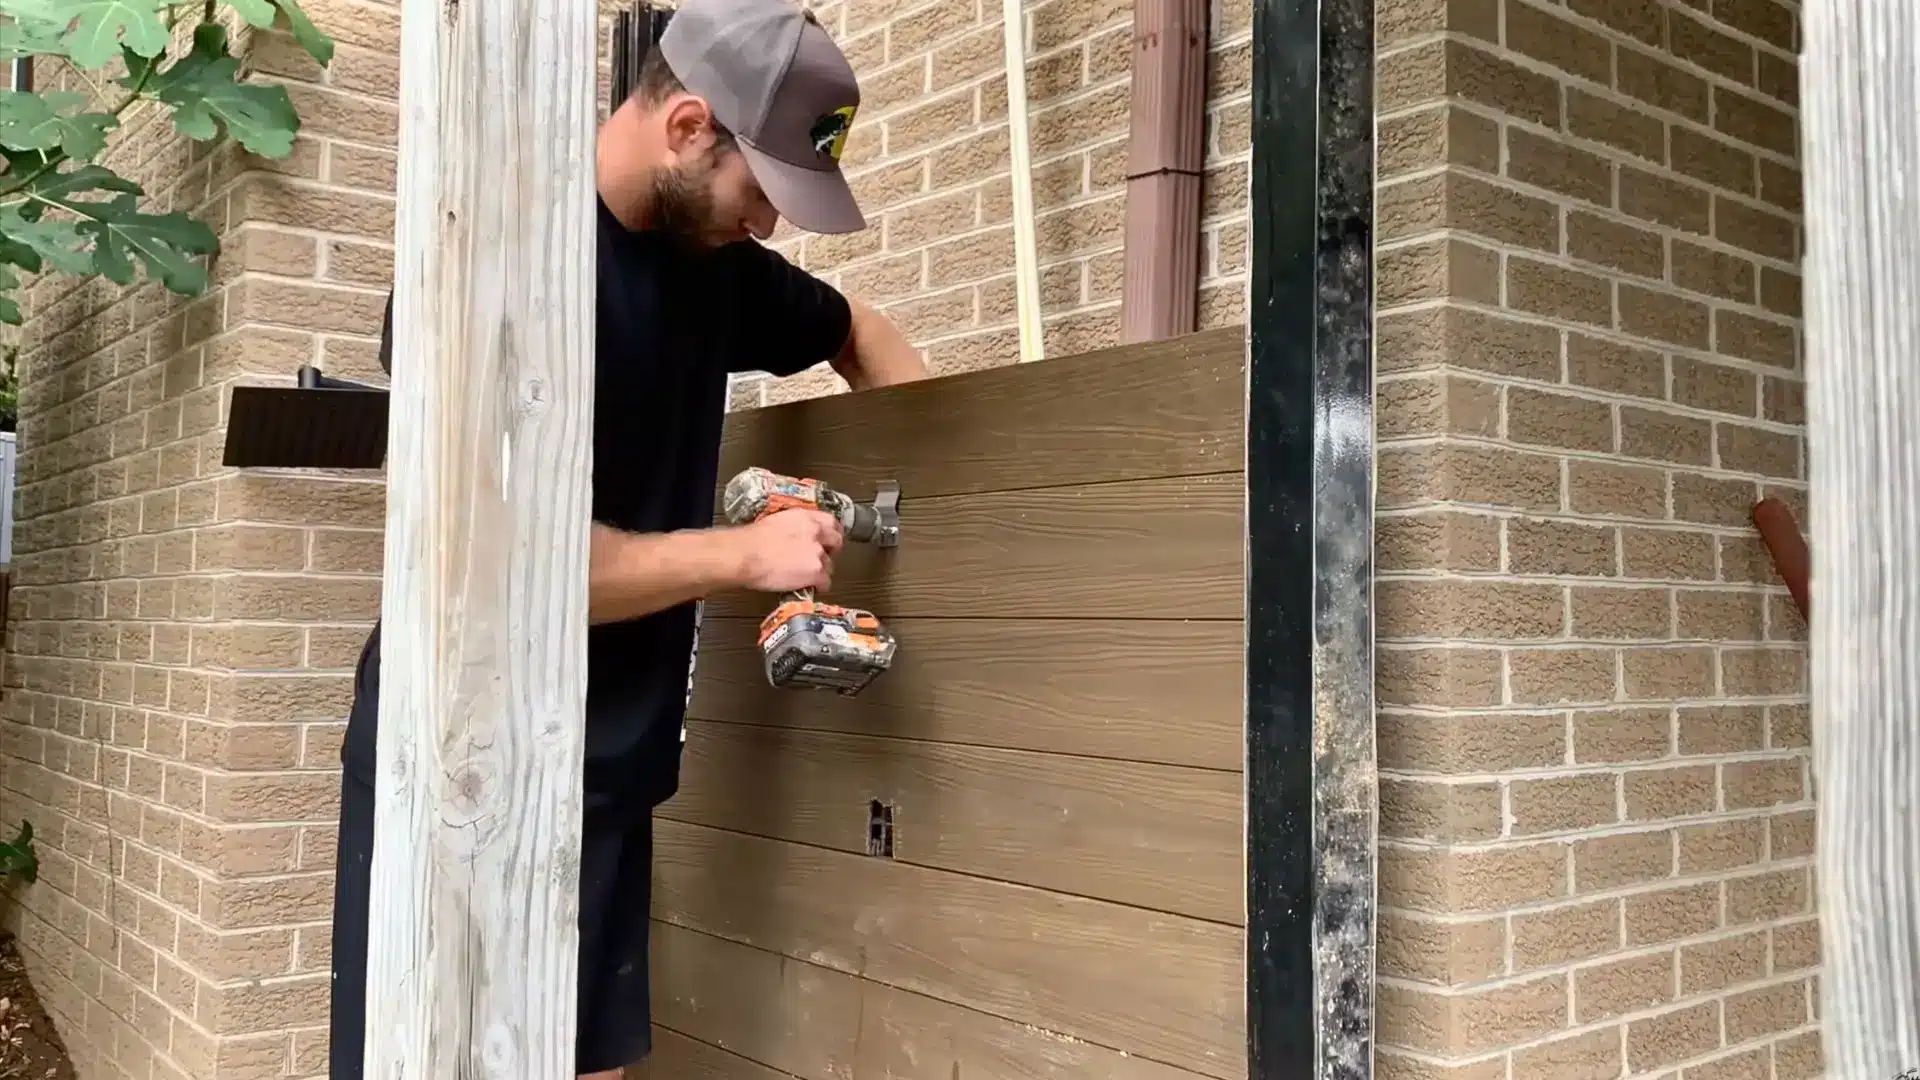
Build the walls and top frame using 2×4 boards around the full structure to improve strength and stability. Add trim along the edges to clean up rough cuts and give a finished look.
Apply a wood sealer and a UV-resistant coating to protect the cedar. Without this step, sun exposure will quickly turn the wood grey within a single season.
6. Install Plumbing and Test
Connect a water line from your outdoor spigot using a Y-connector so you can keep the hose, too. Run galvanized pipes up a post and clamp them with straps.
Add a shutoff valve for control and seal every joint tightly to prevent leaks. Fit the shower arm and head up top, turn the water on, and check for drips.
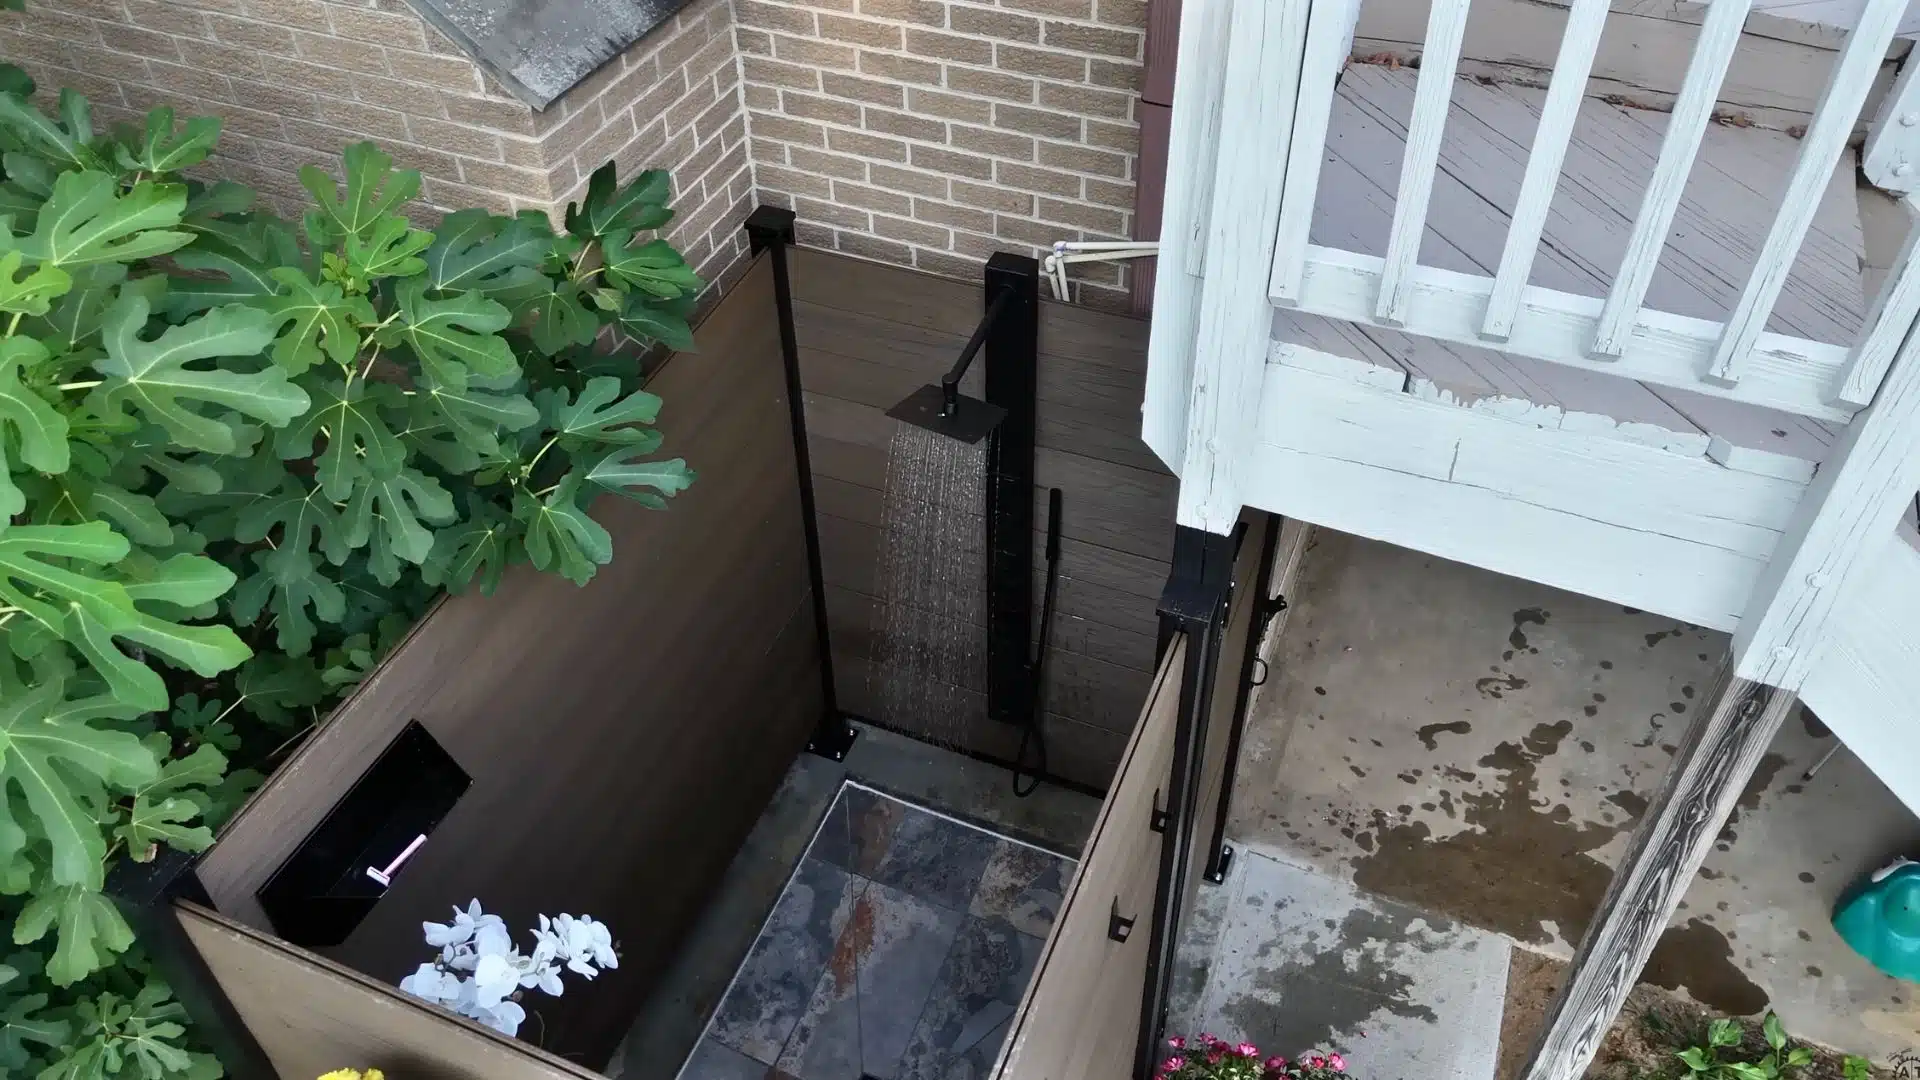
With walls up and water running, your DIY outdoor shower is ready, except for one thing every build has to solve: where the water goes.
For an in-depth look at the whole process, check out the complete video tutorial below:
How Does an Outdoor Shower Drain?
Every outdoor shower needs somewhere for the water to go. Get this wrong, and you’re left with standing water, mud, and a mosquito magnet.
You’ve got three main ways to handle drainage:
- Permeable base: Water soaks straight through a bed of gravel or crushed stone into the ground. The simplest option for showers set away from the house.
- French drain: A gravel-filled trench channels water to a spot well clear of your foundation. Best when the ground doesn’t drain on its own.
- Sewer tie-in: The water connects to your home’s drain lines. The most work, but sometimes required by code.
Note: When water drains into your yard, it becomes graywater. Many areas regulate it, so stick to biodegradable soap to keep your soil and your neighbors happy.
How Do You Winterize an Outdoor Shower?
Skip this step, and a single hard freeze can crack your pipes and split fittings. It takes about 20 minutes and saves a full repair bill come spring.
- Turn off the water supply at the shutoff valve, then open the showerhead and drains to let gravity drain the water, preventing freezing and pipe-expansion damage.
- Blow out lines using compressed air through the supply line, especially for buried or long runs, ensuring all trapped water is fully removed before winter.
- Disconnect the garden hose completely from the spigot, since trapped water can freeze and back up into exterior walls, causing cracks or damage to internal plumbing.
- Apply wood sealer before winter to protect the enclosure from moisture damage, and cover or remove the showerhead if temperatures regularly drop below 20°F outside.
A little prevention now goes a long way, and these simple winter steps keep your outdoor shower safe, dry, and ready to use next season without surprises.
Do You Need a Permit
The honest answer is that it depends on your build and where you live.
A quick call to your local building department settles it before you spend a dime, and that call is the single smartest first step you can take.
You’ll likely need a permit if your project does any of these:
- Ties into your main water or sewer line. Tapping potable water usually triggers a plumbing permit.
- Adds a structure over 120 square feet. Larger enclosures often require full approval.
For most small residential jobs, permit fees run about $50 to $300, far cheaper than the fines for skipping them.
Many areas enforce setback rules requiring the shower to be set back a few feet from property lines, and your HOA may have its own restrictions worth confirming in writing.
What Materials Work Best for a DIY Outdoor Shower?
The materials you choose decide durability, upkeep, and overall performance. Picking wisely early prevents problems and unnecessary replacements later.
Wood
- Cedar: Handles moisture well, resists rot naturally, and is easy to work with while aging into a clean, weathered finish.
- Redwood: Performs similarly to cedar but costs more and can be harder to source depending on your location.
- Pressure-treated lumber: Best for posts and structural framing near the ground, not ideal for surfaces that touch skin.
- Composite decking: Long-lasting and low-maintenance with no sealing needed, but heavier and more expensive to build with.
Floor
- Slatted cedar decking: Simple drainage, comfortable underfoot, and easy to install for most DIY setups.
- River rock over gravel: Natural look with good drainage, but needs a stable base to stop shifting.
- Pavers: Work well when placed on a sloped sand base, allowing water to drain rather than pool.
Hardware
- Stainless steel or coated aluminum: Best for wet conditions, rust-resistant, and longer-lasting in outdoor use.
- Galvanized steel: Starts fine but can rust quickly in constant moisture, especially after a couple of seasons.
- Outdoor or marine-rated showerhead: Handles UV and temperature changes better than standard indoor showerheads.
What Does a DIY Outdoor Shower Cost?
The price swings a lot depending on how fancy you go. The good news is that doing it yourself cuts out the labor, which is where most of the cost hides.
Material costs break down into three major tiers:
| Build type | What you get | Cost |
|---|---|---|
| Basic | Portable or hose-bibb hookup, simple floor | $50–$500 |
| Mid-range | Cold water plus a freestanding enclosure | $500–$2,000 |
| Full plumbed | Hot and cold, permanent lines, full enclosure | $2,500–$8,000 |
For comparison, hiring a contractor for that cedar enclosure often starts around $3,200. Build it yourself, and most of that stays in your pocket.
Wrapping Up
A DIY outdoor shower is one of those backyard upgrades that punches well above its cost, both in daily use and long-term home value.
The key decisions, location, water type, drainage, and materials are all straightforward once you understand what each one actually affects.
Most people overestimate how complex this project is. The right prep work makes the physical build feel straightforward from the first post to the final fitting.
Pick a spot, make that permit call, start simple with cold water, and expand from there.
Frequently Asked Questions
How much does a DIY outdoor shower cost?
A basic DIY outdoor shower costs $50–$500 for a simple hose hookup and floor. A mid-range build with an enclosure runs $500–$2,000. A fully plumbed hot-and-cold setup can reach $2,500–$8,000 depending on materials and plumbing complexity.
Do you need a permit to build an outdoor shower?
It depends on your location and build type. You’ll likely need a permit if you tie into a main water or sewer line, or build a structure over 120 square feet. Cold-water hose setups rarely require one. Always check with your local building department first.
What is the best wood for a DIY outdoor shower?
Cedar is the top choice for DIY outdoor showers. It resists rot naturally, handles moisture well, and is easy to cut and work with. Redwood performs similarly but costs more. Avoid untreated pine; it deteriorates within two seasons in a high-moisture environment.
How do you drain an outdoor shower without connecting to a sewer?
Use a permeable base, a layer of gravel or crushed stone that lets water soak directly into the ground. In poorly draining soil, a French drain channels water away from the foundation. Both options work well with biodegradable soap and require no sewer connection.